Lights, Lights, Lights!

January 30, 2012

It's Monday again!

Before getting to the topic of the post, I want to point out a few changes that I made over the weekend.

I'm participating in a Build a Better Blog in 31 Days challenge/workshop put on by The SITS Girls. I'm learning so much and meeting and discovering new blogs every day. Some of the changes around here have resulted from daily tasks from that challenge/workshop.

Before and After - a new page with easy access to before and afters. The links are listed by room. Most of you know that we don't actually have a finished room yet, so content is pretty limited for now!

Tutorials - this page existed before, but I decided to publish tutorials as their own post, and then list the links on this page (you might have noticed that I published two over the weekend). What I had before was far too tedious!

Inspiration Station - my version of a "blog roll".

What I'm most excited about are my new social media icons at the top of the sidebar. It took way too long, but I finally figured out how to do it. The icons are courtesy of Icons, etc. I'm sad that they don't have a Pinterest icon, but no biggie.

Now, on to more talk about lights!

On Friday, I showed off my top picks for the sconces that will be on either side of the oval mirror. We decided to go with this guy (ordered 2 of them last night - free shipping, too!):


In addition to the sconces, we also need an overhead light. The original 1950's era - that's when the house first got electricity - light base is currently there, but the shade (as well as the shades for all of the other original light fixtures) is long gone. It's also not centered in the room. We're rewiring while all the framing is exposed, so it'll be easy to relocate the fixture on the ceiling. I'm pretty undecided about what I'd like to see up there. Pendant or flush mount? Neither one of us is interested in a chandelier.


via Rejuvenation. $117


I've scoured Home Depot's website, as well as Overstock.com and Canadian Lighting Universe, and we just can't find something that we love. I'm crazy about school house lights, but Mike...not so much. Perhaps we'll actually get our butts into town and take a look in store sometime soon.

More updates coming Wednesday!

Tutorial: Fixing a Wood Window Sash

January 28, 2012

How to Fix an Antique Wood Window Sash

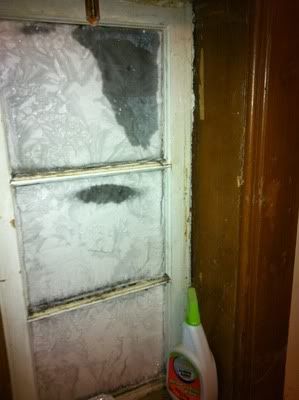
When my boyfriend and I purchased our century home just over a year ago, one of the items at the top of our mile long to-do list was to replace all of the original wood and wavy glass windows. Big expensive projects have a way of worming their way down to-do lists, and in this case, I'm thankful! It's given us a chance to research old homes and embrace the "technology" of days past. But, do they ever need some work...

Before.

Believe it or not, a properly restored single pane wood window, combined with a properly fitted storm window and weatherstripping, can be just as energy efficient as the average replacement vinyl window. If you happen to live in an old house, restoring your existing wood windows is an opportunity to keep material out of the landfill and gives you a chance to learn more hands on skills, while maintaining the character and historical integrity of your home. And the best part? If you do it yourself, you'll save money!

What you need:
Heat gun or chemical paint stripper
Steam producing machine
Easy to wield chisel
5-in-1 scraper tool
Needle nose pliers
50 grit, 80 grit, and 120 grit sandpaper (sanding sponges are also great)
Electric sander (not absolutely necessary, just speeds up the process)
Wood filler and/or wood epoxy
Oil based exterior primer
Latex (or alternative) gloves
Glazing putty
Glazing tool
Glazing points
Exterior paint in a colour of your choice (latex or oil based)
Painter's tape

What you need to do:
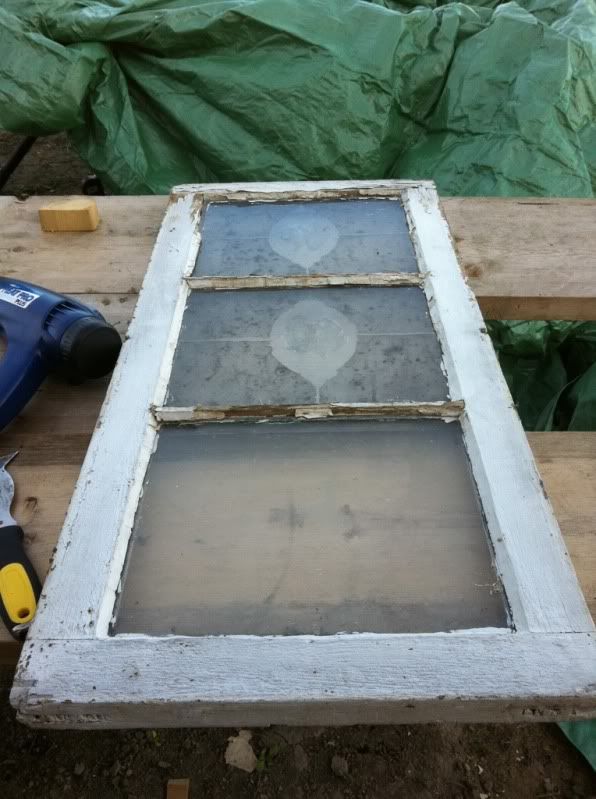
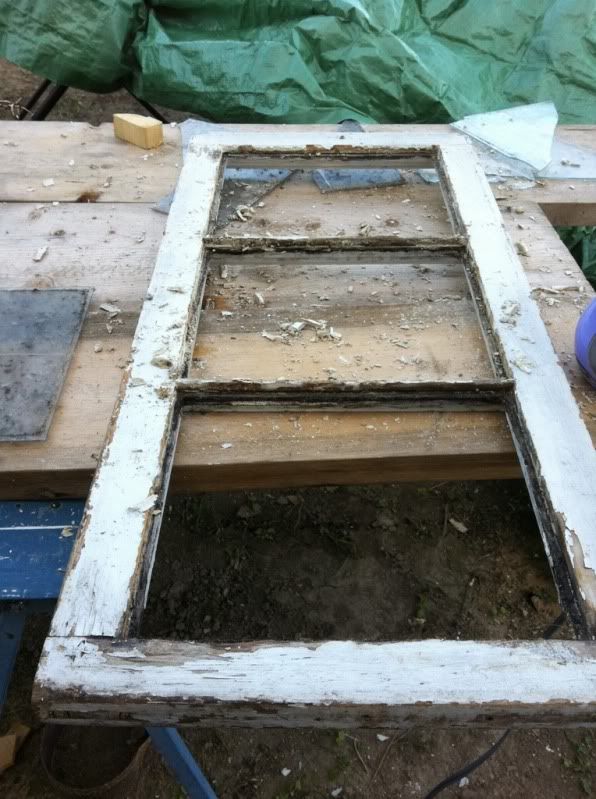
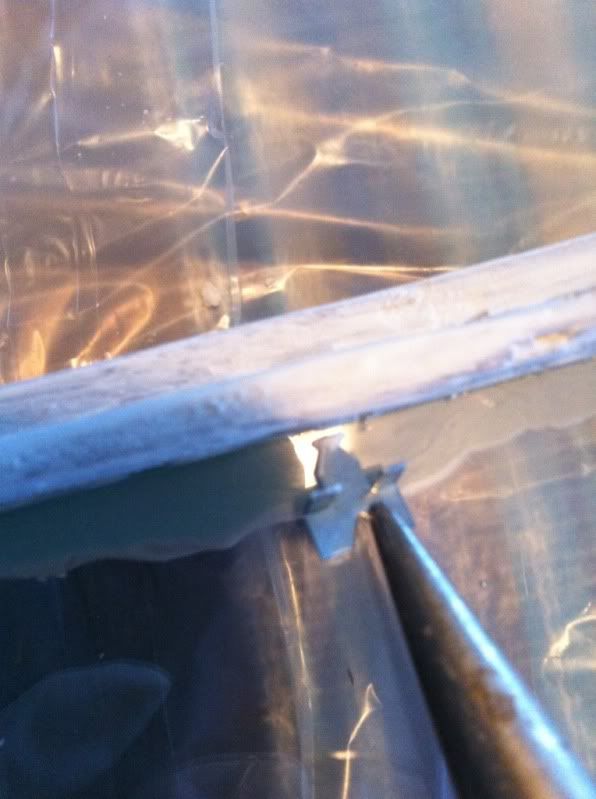
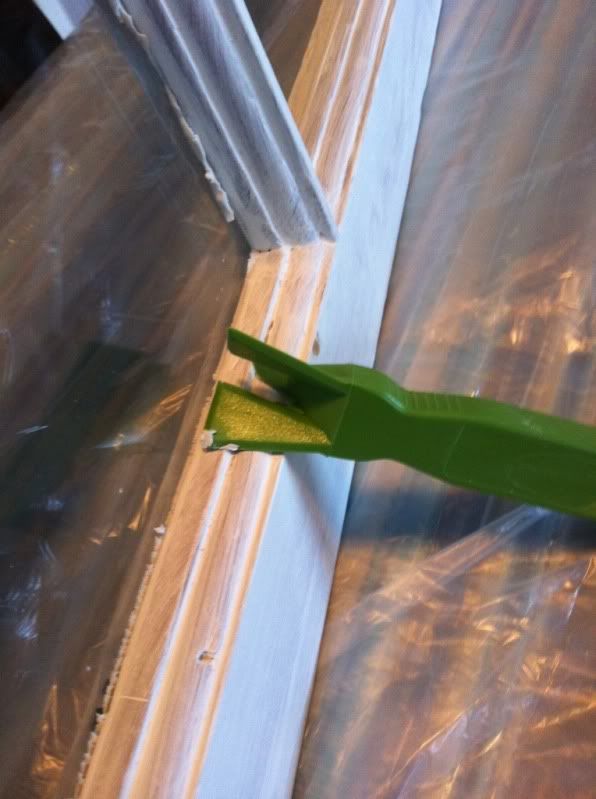
1. Carefully remove the glass from the window sash. Do this by softening the old glazing putty with the steamer. Do NOT use the heat gun! The glass will crack from heat stress. Use the wood chisel to gently scrape away the softened putty (I found the sharp edges of the chisel to be more efficient than the scraper tool). In some places, you may feel resistance. You may have come across a glazing point. These little things help provide strength for keeping the glass in place. Clear putty away from the glazing point. Gently slide the chisel between the glass and the glazing point, and bend the point up. With your needle nose pliers, grasp the point and pull out from the wood. Continue until you have removed all of the putty and glazing points. Your glass pane should lift out with minimal pressure applied to the back.

Cracked glass from using the heat gun. Chunks of old glazing putty being removed.

Glass removed.

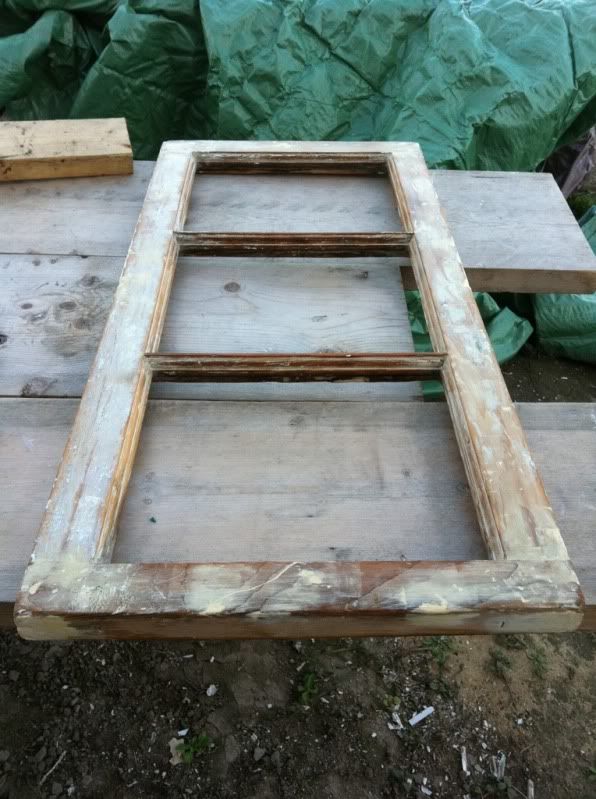
2. Remove old paint from the window sash. Work in a well ventilated area and wear a filtered mask. Depending on the age of the window, you might need to check for lead content in the existing paint and handle accordingly. Either a heat gun or a chemical stripper, in addition to the man power of a scraper tool, will make quick work of this step. This task can be tedious - you'll be surprised how much paint has layered up and completely hidden the details of the trim. Ensure to clean up thoroughly and discard any paint chips or chemical residue.

3. If your old window hasn't seen any maintenance in a long time, you may have wood that appears quite weathered. Sand all surfaces with very course grit sandpaper. Repair any gouges or holes with wood putty or wood epoxy. Allow to dry and/or cure, and then sand with a medium grit sandpaper. Finally, sand with fine grit sandpaper for a nice smooth surface. Sanding sponges work great for trim details.

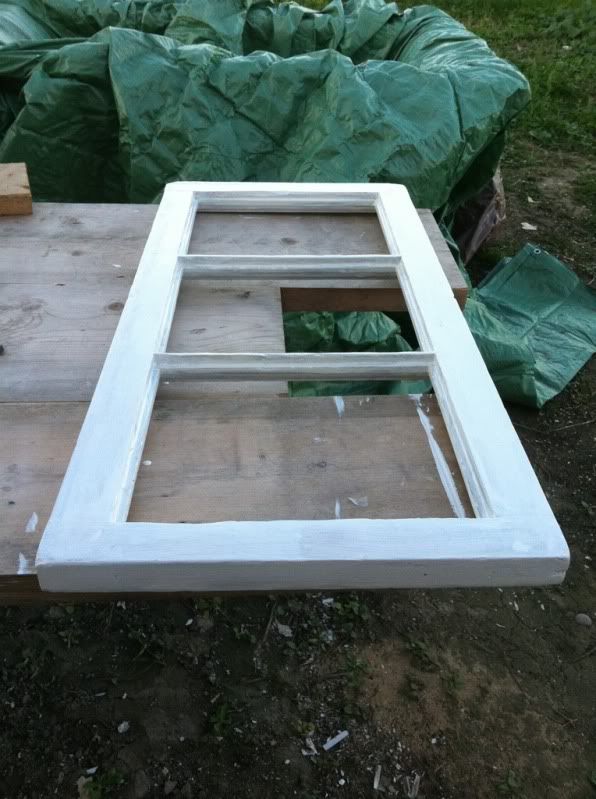
Scraped, sanded, and puttied.

4. Prime your sash with a good quality oil based exterior grade primer. Look for a quick drying primer, rather than a penetrating primer, to keep this step short.
Primed.

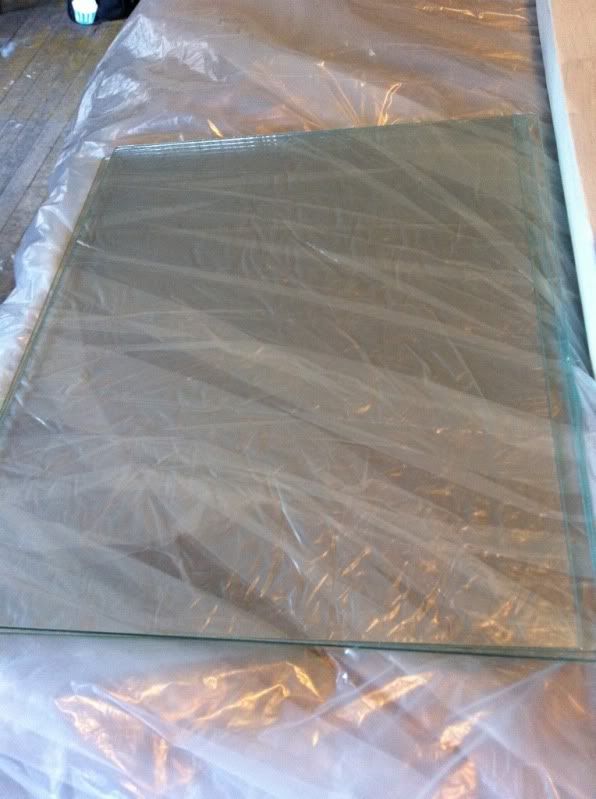
Once your primer has dried, you're ready to re-install your glass. If you managed to remove all of your glass without any breakage, congratulations! If you didn't, don't worry. Clear glass can be custom cut for a very reasonable price. If you would prefer to keep the historical look of wavy glass, keep your eyes peeled in antique stores and salvage yards. Many glass places will cut customer owned glass for a fee.

New glass.

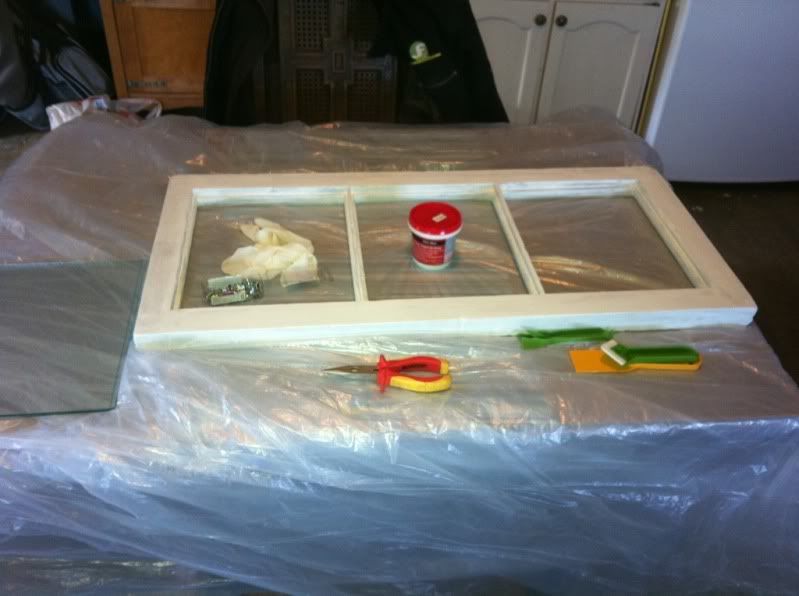
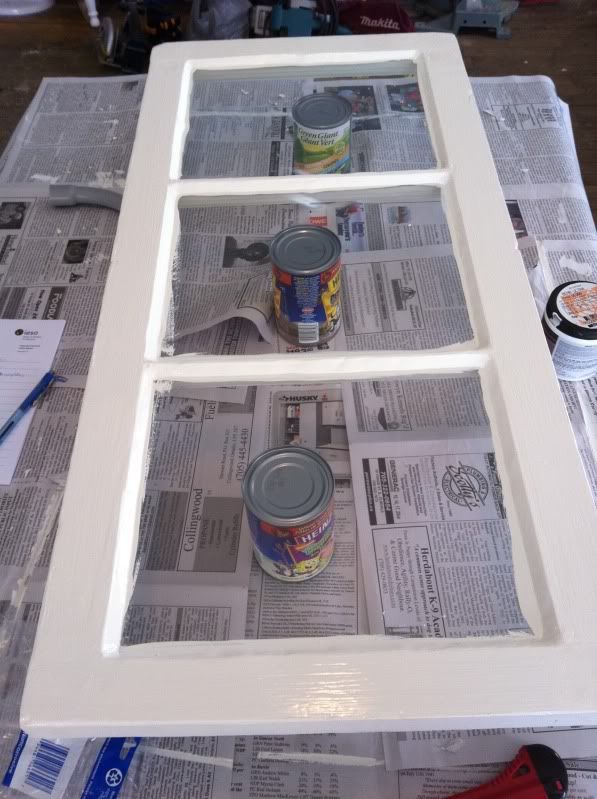
5. Before installing your glass with new putty, set up a workspace where everything you need will be within easy reach.

Accessible materials.

Wearing your gloves, take a handful of glazing putty and warm it in your hands. Create a bed of putty to lay your glass on. This keeps water from making its way between the glass and the wood, which would lead to premature failure of your restoration.

More is better. It's easier to scrape away excess than try to fill in gaps.

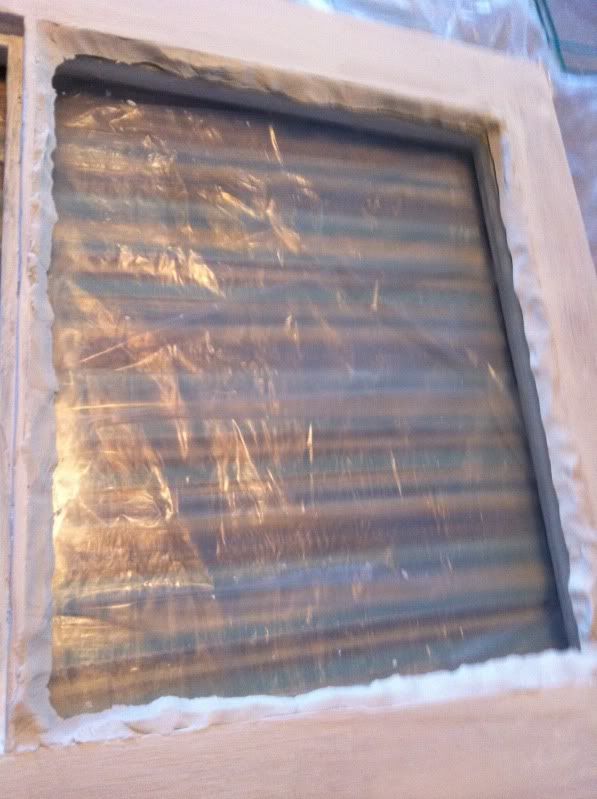
Press your glass firmly, but gently, into place. Excess glazing putty will squeeze out the other side - that's okay! Leave it for now.


Glass in place.

6. Now, replace your glazing points. You can reuse the old glazing points, but new ones are preferred. With your needle nose pliers, grasp the non-pointed end of the glazing point. Firmly press the point into the wood, and wiggle back and forth to penetrate. The number and positioning of your glazing points will depend on the size of your glass. For small panes of glass, one centrally placed point on each side is sufficient.

Installing a glazing point.

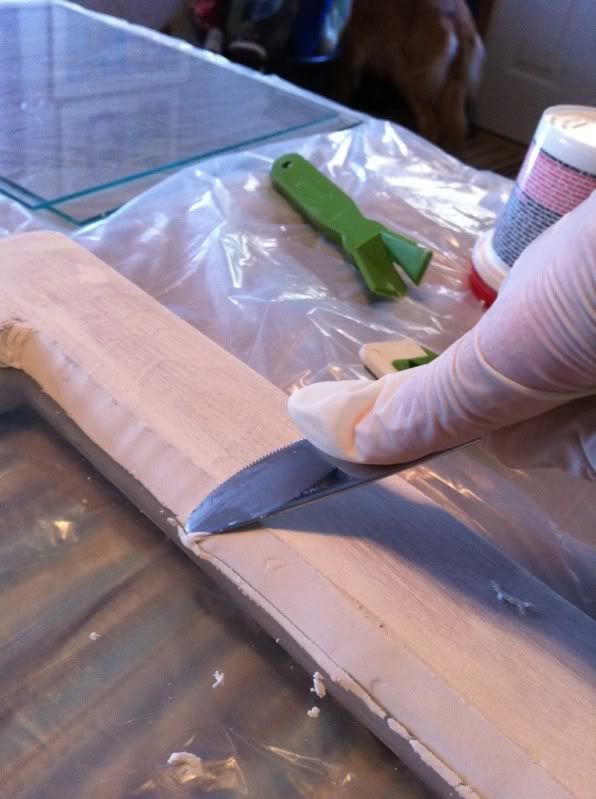
At this point, your glass is secure enough to be able to turn the sash over and trim away any excess glazing putty that snuck out the side after pressing your glass into place.

Pictured is a caulk removing tool, but anything with a well defined edge (like an exacto knife) will do this job.

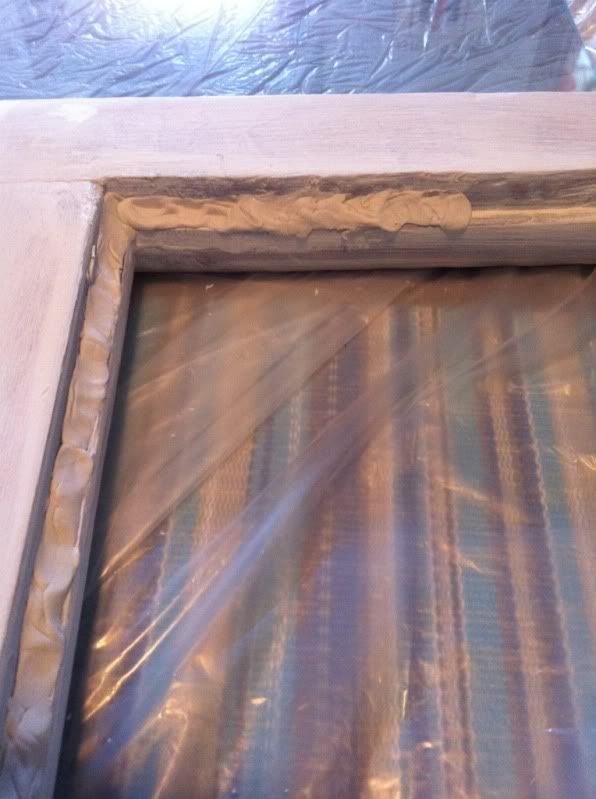
7. Secure your glazing points by applying putty over them. You can either mush lumps of glazing putty into the L-shape created by the wood sash and glass, or you can shape your putty into a "snake" and then mush it in to ensure that there are no gaps.


Smooth your putty using your glazing tool. You want the glazing putty to sit at an angle, to shed water. Your corners should be concave. Any creases may result in water infiltration.


8. When all of your glass has been installed, allow your glazing putty to cure according to the specifications indicated on the packaging. Set time varies tremendously between brands of putty.

9. If required by the specifications of your glazing putty, apply a second coat of oil based primer to both sides of your window sash. Overlap onto the glass, just enough to completely cover any exposed glazing putty. Use tape to keep your lines tidy.


You'll notice I didn't use tape. I'll get to that.

10. When your primer has dried, apply two coats of exterior paint (allowing sufficient dry time between coats). Ensure you are overlapping all primed glazing putty. When your paint has dried, remove the tape. If you have an aversion to using tape, because you can never get it lined up just right, score a line in the paint using something with a straight edge, and scrape away excess paint and primer using a razor blade or exacto knife.


And then...


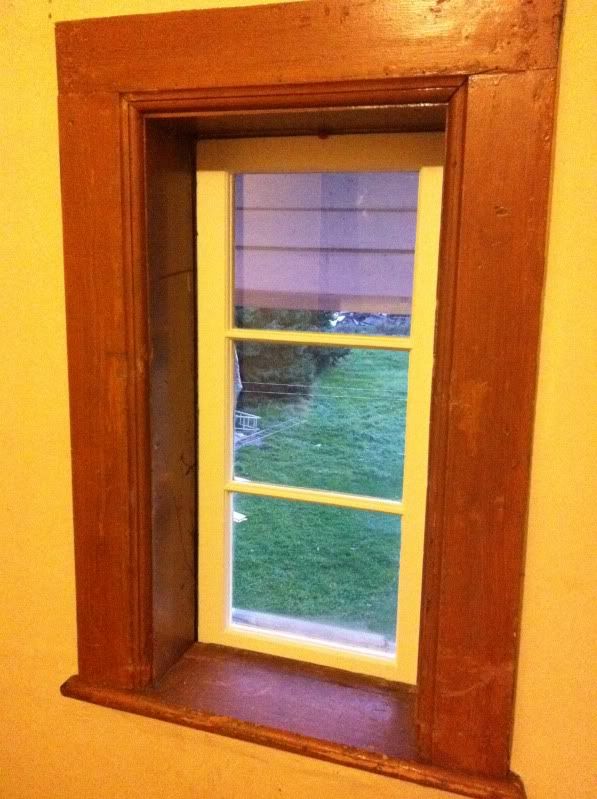
You're done!

Cost breakdown for materials:
Glazing putty $4
Oil based exterior primer $15 (1 quart - enough to do at least half of our remaining 24 window sashes)
Glazing points $2 (for enough to do all 24 sashes in our house, with plenty left over)
Exterior latex paint $4 (for a sample sized pot)
Wood putty $6 (although I already had this on hand, and have lots left over)
Sandpaper and sanding sponges $10
New glass $12

For a grand total of $53. Which may seem like a lot - but when you consider that I have enough primer, glazing points, and wood putty to do many, many more windows, and that I won't need to replace glass in many of them, it's actually quite cost effective. Especially when compared to the cost of a custom sized vinyl replacement, which can run into the the $100s. Plus, a properly restored window, with regular maintenance like paint touch ups, can easily last 50 years or more.

And there's nothing like a little sweat equity to maintain the beauty of your home.

Tutorial: Really Cheap Christmas Wreath

How to Make a Christmas Wreath from Toilet Paper

This is the cheapest wreath you will ever make!

toilet paper christmas wreath

What you need:
Toilet paper
Glue gun
Foam pipe insulation (or other wreath form)
Ribbon
Heavy duty tape
Thumb tack

What you need to do:
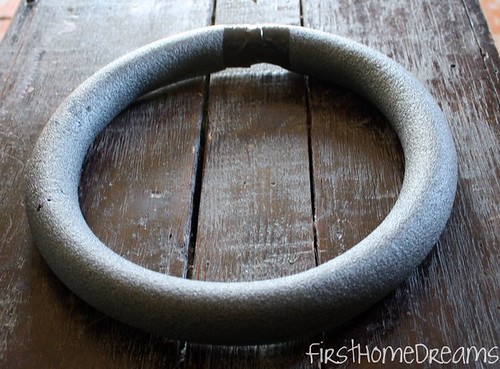
1. With your piece of foam pipe insulation, create a circle, taping the ends together to hold. I used electrical tape, but duct tape would also work well.

foam insulation wreath form

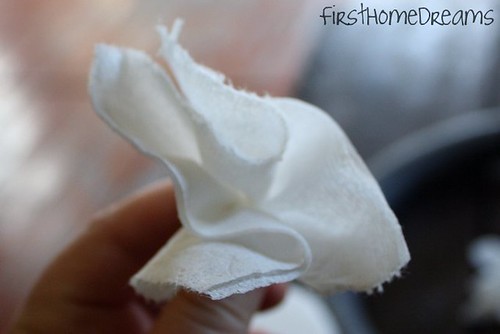
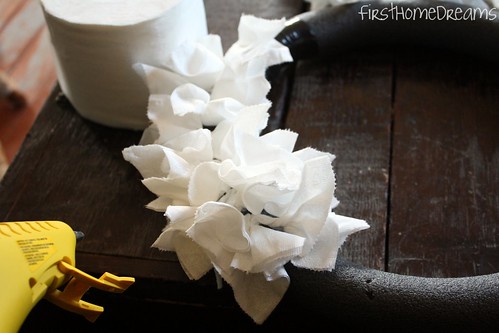
2. Tear off individual squares of toilet paper, relatively carefully (unless you want an even shabbier look). Fold, squish, twist or whatever else you need to do to get a shape resembling some sort of flower.

toilet paper christmas wreath

3. With your glue gun, apply a small amount to the end of your toilet paper "flower", and stick it to your wreath form. Be careful! If your glue is too hot, you will melt the foam and make a big hole. I have a feeling my glue gun is hotter than most, though (as evidenced by the huge blister I have on my palm - ouch). I applied them in an alternating fashion - one sticking out one way, the next sticking out the other way. When I had gone all the way around the wreath, I filled in any gaps with more "flowers".
toilet paper christmas wreath

4. While I gave the hot glue a chance to set up, I made my bow. I can never tie a bow flat, so I made one out of two seperate pieces of ribbon. First, each piece was folded into an awareness ribbon shape, and the point of contact was secured with a dab of hot glue. Then, I glued the two together.

ribbon bow


5. Next, I looped a length of ribbon around the top of the wreath, and secured the ends together with another dab of hot glue. Before securing, I made sure that the loop was arranged in a way so that the wreath would lie flat against the wall (not pictured, sorry). I attached my bow to the ribbon loop with glue.

6. To hang my wreath, I used a decorative thumbtack that I had on hand. I stabbed the thumbtack through the center of the bow, and I think it finished the bow off nicely since it didn't really have a center. If you are planning on hanging your wreath somewhere other than a wall, you may want to use a button or something similar that doesn't have a pokey end sticking out the back.

ribbon bow


7. Hang in the location of your choice! I chose to put it above the french doors in our living room.

toilet paper christmas wreath

I hope you liked this quick and easy tutorial!

Light Up My Face

January 27, 2012

If you've been following along, you know that we've been taking our sweet time when it comes to renovating the bathroom. It's a complete gut job, so we're redoing everything. We've hummed and hawed over a million different layouts (here, here, and here), and now that we have that sorted out we finally feel ready to start planning out and purchasing fixtures. I've even got a jump start on decorating. Here's a look at our giant to-do list:

Bathroom Reno

(in no particular order): 
  • gut entire room, including floor 
    • take salvageable fixtures to Habitat for Humanity Restore 
  • buy new hot water tank, relocate to basement 
  • sister existing joists 
  • lay new sub floor 
  • frame out new walls 
  • re-route all plumbing, using pex 
  • buy floor tile, tile floor 
  • buy tub, install 
  • buy tub alcove tile, tile alcove 
  • buy tub/shower trim kit, install 
  • build/buy vanity, install 
  • buy sink faucet fixture, install 
  • buy mirror, hang 
  • hang drywall 
  • mud drywall 
  • buy exhaust fan, install 
  • buy toilet, install 
  • sand and repaint all existing baseboards and casings
  • restore big window 
  • find a stained glass window for the little window 
  • buy stacking washer and dryer, hook up 
  • sand and repaint original door, 
  • put original hardware back on 
  • pick a paint colour, paint 
  • pick an over head light fixture, install 
  • pick vanity light fixture, install 
Although we've got bigger fish to fry, I've got lighting on my mind today!

For the vanity, I'm thinking two sconces on either side of our new oval mirror would be best. It's kind of important to me that we find something where the shade can point down, because we unfortunately get a lot of bugs (mosquitoes, ladybugs, and flies have pretty easy access due to our window screen inserts not fitting properly).

I don't want to spend any more than $40 per sconce. We haven't looked in any stores yet, but the internet yielded a few good choices.

I really like the idea of this one - it's reminiscent of this outrageously priced light fixture that I featured in a Frivolous Friday post. At just $39, it's definitely a more affordable option. But something in me is saying that having two adjustable lights would be too much going on. The finish also doesn't match the mirror, but I'm not opposed to mixing metal finishes in a room. Being able to adjust the lights would come in handy for plucking eyebrows and shaving beards...
I always jump at the square and rectangle sconces, but then the more I look at them, the more I think that it would look weird when paired with an oval mirror. Each light is just $31.


This one is my favourite of the bunch. I like the smaller circular base, and that the shade has nice straight lines. It rings up in the middle of the three at just under $34.

So many decisions!! But the more we can get done before dooms day, the better. Before I sign off for the weekend, I had mentioned in a previous post that I would give a breakdown of what we've spent so far.

Toilet - $90 (50% off at Home Depot)
Mirror - $25 (75% off at Rona)
Fan - $35 (full price, Home Depot)
Floor tile - $1.52/sq. ft. x 120 sq. ft. (10% off, Rona)
Accent mosaic tile - $14.99/sq.ft x 3 (regular price, Home Depot)

Have a great weekend!

Lock It Up!

January 25, 2012

On Monday, I let you know I had a little somethin' somethin' in the works for the bathroom. We have just under a month until we're ripping into the ugliest room in the house, so I'm getting as many little things as I can done before we start.

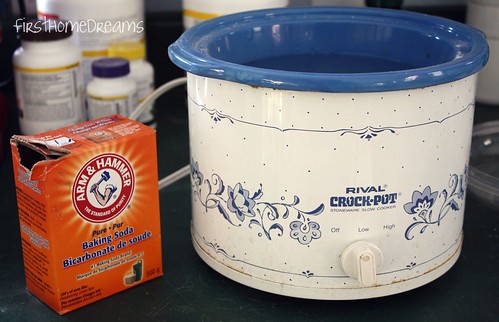
So what does a crock pot and steel wool have to do with, well, anything?

Restoring antique hardware!


The bathroom door is a solid wood 4 panel door typical of Victorian homes. These doors would either have a mortised lock or a rim lock - it's not very often that a door was fitted with just a knob. Our door is covered in layers and layers of paint, but we could see the shadow of where a rim lock used to be, and the keeper was still attached to the jamb. Whatever happened to the original rim lock? Who knows.

 
From left to right: 4-panel door, mortise lock, rim lock (please click for picture source).

There was another keeper hanging out in a door-less door frame on the other side of the kitchen (I suspect that the bathroom was originally a pantry *note to self: share a floor plan one day* - apparently back in the day people felt the need to be able to lock their kitchens and their pantries off from the rest of the house). We found the missing door in the shack before it collapsed, and it still had it's rim lock - hooray! We have no intention of putting that door back in it's place (it's weathered and cracked beyond repair), so I removed the rim lock for the bathroom door.

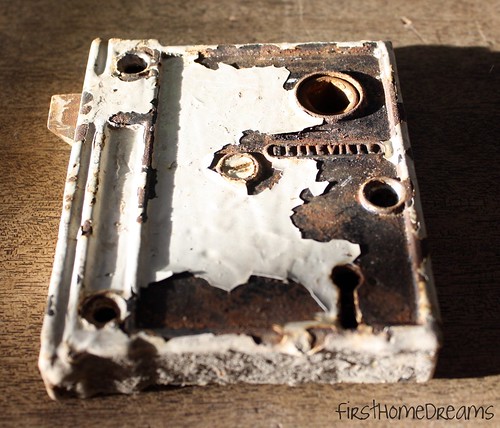
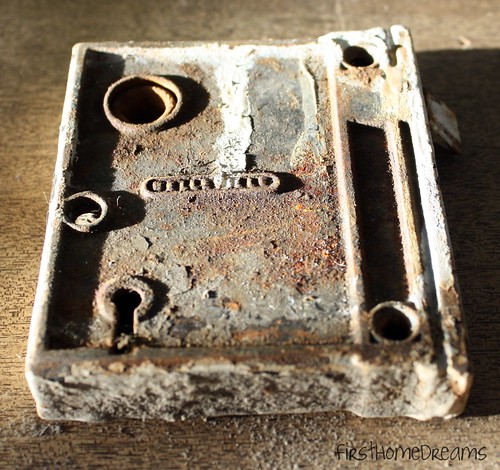
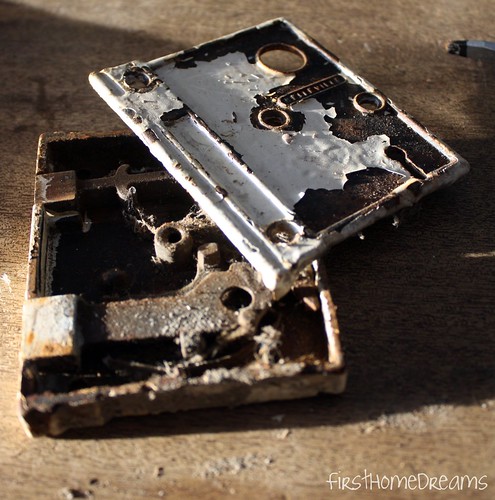
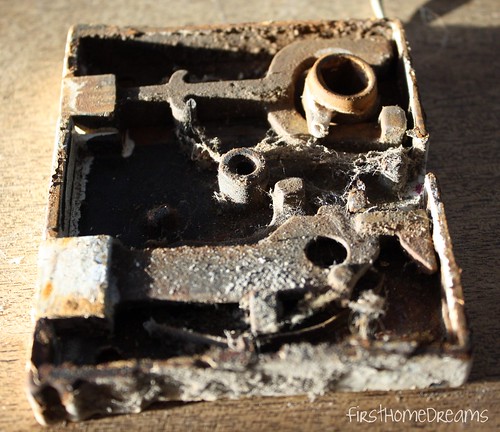
It was a hot mess, and that's being polite.

antique cast iron rim lock

antique cast iron rim lock

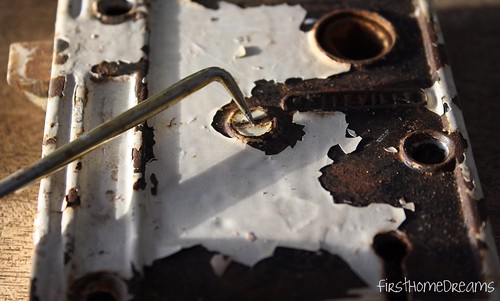
The first thing I had to do to get this back in working order was to take it apart. Since it had been caked in paint in a previous life, I used a dental pick type tool to scrape the paint out of the screwdriver notch (what's the real term for that?!).

Antique cast iron rim lock

I removed the screw - making sure I put it somewhere safe! - and the back came off easily.

antique cast iron rim lock

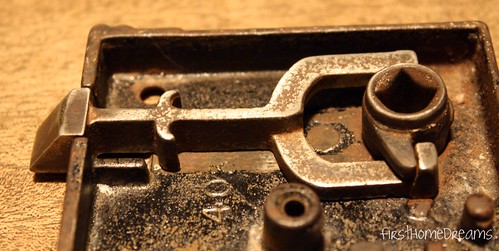
It was pretty gross in there. I have a feeling this thing hadn't been cleaned more than a handful of times.

antique cast iron rim lock

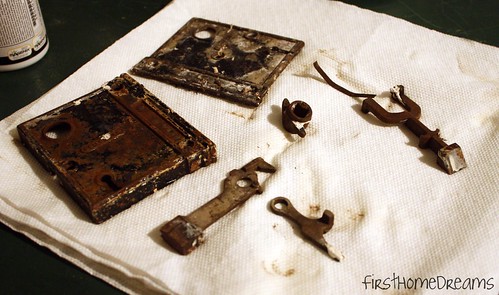
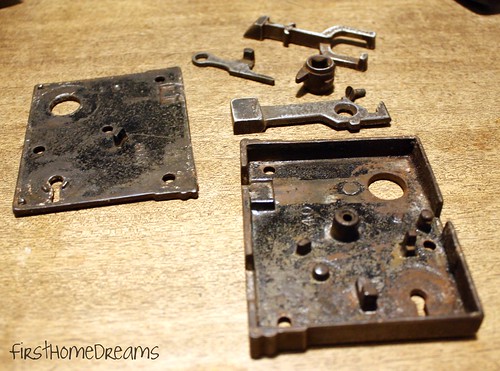
Before going any further, I took a million pictures before and in between removing each of the individual parts (there were 5 total pieces inside the casing). Once everything was removed, I was ready to move on to the cooking.

cleaning antique hardware


Crock pot, water, baking soda, hardware. Cook on low for a whole bunch of hours. I don't have a set time - it depends on how paint caked the hardware is. I've also had good luck using TSP instead of baking soda, and I've heard of people using dish soap with good results as well. So you can pretty much use whatever you have on hand. The water will turn really murky and gross as it cooks. I think it goes without saying that you should use an old crock pot that you will not be cooking food in.


A lot of old cast iron hardware has a powder like coat of black paint that is really hard to remove. Although I let these pieces cook for a lot of hours, I wasn't happy with how clean they were coming, so I decided to let them have a good soak in a chemical stripper. After allowing the chemicals to do their magic, I was rinsing/washing, scrubbing clean with steel wool, rinsing/washing, patting dry. This is an incredibly tedious and dirty process. I paid more attention to the moving parts and the sides of the casing that will be seen, rather than the inside (you can see evidence of that below).

restoring antique cast iron rim lock


restoring antique cast iron rim lock


restoring antique cast iron rim lock

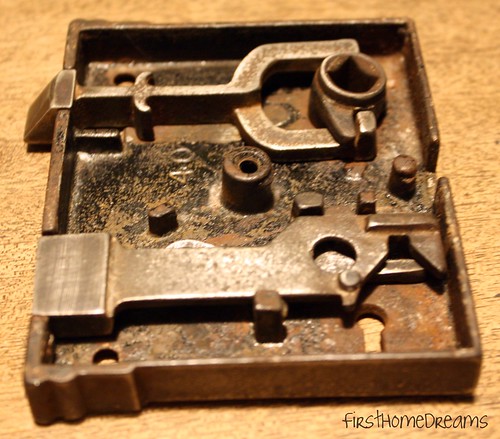
At this point, I stared at and fiddled with this darn thing for probably 20 minutes trying to make it work, until I realized I was missing the mechanism to make the latch spring back into place. It's also missing a similar mechanism for the lock, but since we don't have the key anyway, I'm not concerned with making that functional. I found the piece I had forgot about (the skinny straight piece of metal), and positioned it so that when the doorknob wasn't being turned, it would force the latch back out. The final step before putting the cover back on was to liberally apply some WD40 to keep things moving smooth.

restoring antique cast iron rim lock

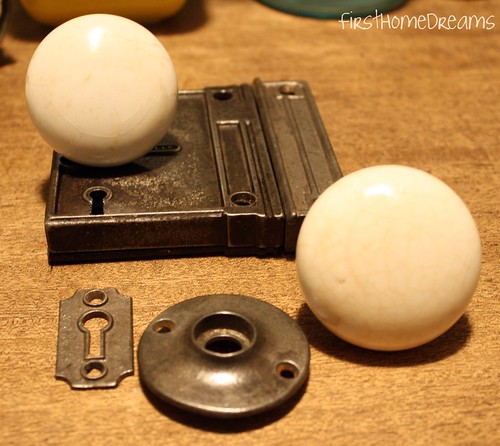
All of that to get to this:

Restored Antique Cast Iron Rim Lock Porcelain Knobs


A 113 year old piece of hardware that still works! Although I'm not perfectly happy with it yet. All of the pieces, including those on the inside, need another once over with steel wool. Once any remaining specks of rust (and blackness on the case) are removed, everything is going to get a coat of poly to prevent any further rusting. Of course I'll have to clean all of that WD40 off of everything first, and then reapply it once the poly is dry. So many steps. Worth it? Heck yes.

Update! See this lock re-installed here.


I'm linking this post to...
The Shabby Nest

Home Stories A2Z

Blog Design by Nudge Media Design | Powered by Blogger