Showing posts with label Christmas. Show all posts

Obligatory Christmas Decorating Post

December 2, 2013

I had planned to do very little decorating this year. At first I found myself saying I wasn't going to be decorating at all, but then real me laughed at attempting-to-be-practical me and ended up buying a whole bunch of new Christmas stuff. Mike and I won't be here for Christmas (we're heading to BC on the 21st to spend time with my family!), so even though it's my favourite part of this festive time of year, getting a tree would be a bigger pain in the arse than it's worth. Coming home to a gazillion dried out pine needles isn't my idea of a good time.

But, we're lucky to have a GIGANTIC (propane) fireplace in this house, and it happens to be in my favourite room, so I was pretty excited to throw some stuff at it all in the name of some jolly guy in a red suit.

cottage christmas fireplace mantle

traditional christmas mantle

I made the stockings myself, and they're really for decorative use only (we have special ones that were handmade by family that we actually use). If someone wanted to turn them into the real deal, they'd probably want to line them with something soft because burlap is pretty much the worst. Also, don't wash burlap unless you want to panic and think that a small furry animal somehow managed to get into your washing machine and then it's entire being except it's hair dissolved into nothingness.

burlap and plaid stocking

red green and gold christmas

christmas fireplace mantle

Merry Christmas!

December 21, 2012

Merry Christmas Printable


See you in 2013!

Did you like this post? Click here to subscribe and be notified of new posts. You can also find me on Twitter, Facebook, and Pinterest.

Bring on Christmas! I'm done decorating.

December 17, 2012

Just a few days after proclaiming that I'm officially in the Christmas spirit, I'm now officially finished with my Christmas decorating. I didn't do much, because really...I'm not into cleaning up a whole bunch of stuff come January, especially with the whole wedding thing happening in February.

This weekend I decorated our front door, although not the one that we actually use. I decorated what I call the "old front door".

farmhouse christmas front door

Here it is!

December 13, 2012

Well, you asked one of you asked. Which is good enough for me. Here's our run of the mill Christmas tree!

decorated christmas tree

I'm officially in the Christmas spirit.

December 10, 2012

Well folks, I finally feel like Christmas is on its way. I'm by no means ready for the big day, but I'm starting to get excited!

On Friday night a friend and I attended a wreath making workshop at Bradford Greenhouses in Barrie. Since I got there early, I took it as an opportunity to wander around and marvel. And marvel I did. I also may have drooled a little. This place is amazing at Christmas time!

Bathroom, meet Christmas

December 6, 2012

I had a better post written for this last night, but it has disappeared into the bowels of the interwebs.

So here's an outhouse decorated for Christmas.

Christmas bathroom decoration

Because we're classy like that.

Did you like this post? Click here to subscribe and be notified of new posts. You can also find me on Twitter, Facebook, and Pinterest.

Making New Traditions

November 30, 2012

This Christmas will be the first Christmas that Mike and I have spent together since we started seeing each other five years ago. This is also the first Christmas that I won't be going home to Vancouver Island and the first Christmas that I won't be seeing my parents and my brother when I get up on Christmas morning.

That was a lot of Christmases.

Not seeing my family is going to be hard, and I've been warning people for awhile now that I could be cranky because of it. But despite my sadness, I'm also excited to build new traditions with that lanky guy that will soon be my husband. Although I guess they mostly won't be new - more than likely they'll be adapted from what each of us did growing up with our own families, and we'll squish them and mold them them into something that works for us.

Source: etsy.com via Maureen on Pinterest


The most important (to me) tradition that I'm bringing to the table is about the tree. It must be real, and we must go and cut it down ourselves. We're hitting up Drysdale's Tree Farm next weekend to go pick ours out. Tass gets to come too! It's a whole family affair.

Drysdale's Christmas Tree Farm in Essa, Ontario
Drysdale's Christmas Tree Farm in Essa, Ontario via J-K Wong on Flickr.

So far from Mike's side of things we've got the nativity scene. His grandma who just recently passed away always gave each couple a different nativity scene, and we got ours just a few days before she passed away. My family doesn't do nativity scenes, so this is new for me! The set we were given is beautiful stained glass; watch for pictures coming soon.


If/when we add to our family, I'm sure the traditions that we start this year will evolve even more. We'll watch a favourite movie, read a favourite book, eat a favourite breakfast, develop our "go to" stocking stuffers.

Source: etsy.com via Kim on Pinterest


Change is good - I can't wait.

Pssssst! Who can tell me what movie that last quote is from?! What Christmas traditions do you have in your house?

Did you like this post? Click here to subscribe and be notified of new posts. You can also find me on Twitter, Facebook, and Pinterest.

Christmas Inspiration, via Pinterest

November 28, 2012

I guess it's that time of the year! Although I am still planning on making myself hold off on decorating our house until at least December 1st, that doesn't mean that I'm not planning, searching for inspiration, and maybe evening buying a few things.

Pinterest is of course the place to go to find gobs and gobs of pretty pictures, so here's a quick round up of what's making my eyes pop out of my head lately.


Source: google.com via Ashley on Pinterest


How is your decorating going? Are you finished, or still playing the waiting game? Also...tell me which picture is your favourite!

Did you like this post? Click here to subscribe and be notified of new posts. You can also find me on Twitter, Facebook, and Pinterest.

Free Christmas Printable

November 25, 2012

This is another one of those times where I'm loosely following the definition of a blogging buzzword.

I made a thing! That you can print! And I'd like to share it with you!

It's one of my favourite lines from the live action Grinch movie...

Christmas Printable

You can download it here (it's currently the only file available, but in case someone is reading this post in the future and I've since added more, you're looking for the one called Joyful&Triumphant.pdf). Oh, it's 8x10, by the by.

I have yet to print it myself, since I'm waiting until at least December 1st to do any decorating.

I hope you like it!

If someone out there reading knows how I can set it up so that people can just click and the .pdf opens, I would appreciate some advice!

Did you like this post? Click here to subscribe and be notified of new posts. You can also find me on Twitter, Facebook, and Pinterest.

Tutorial: Really Cheap Christmas Wreath

January 28, 2012

How to Make a Christmas Wreath from Toilet Paper

This is the cheapest wreath you will ever make!

toilet paper christmas wreath

What you need:
Toilet paper
Glue gun
Foam pipe insulation (or other wreath form)
Ribbon
Heavy duty tape
Thumb tack

What you need to do:
1. With your piece of foam pipe insulation, create a circle, taping the ends together to hold. I used electrical tape, but duct tape would also work well.

foam insulation wreath form

2. Tear off individual squares of toilet paper, relatively carefully (unless you want an even shabbier look). Fold, squish, twist or whatever else you need to do to get a shape resembling some sort of flower.

toilet paper christmas wreath

3. With your glue gun, apply a small amount to the end of your toilet paper "flower", and stick it to your wreath form. Be careful! If your glue is too hot, you will melt the foam and make a big hole. I have a feeling my glue gun is hotter than most, though (as evidenced by the huge blister I have on my palm - ouch). I applied them in an alternating fashion - one sticking out one way, the next sticking out the other way. When I had gone all the way around the wreath, I filled in any gaps with more "flowers".

toilet paper christmas wreath

4. While I gave the hot glue a chance to set up, I made my bow. I can never tie a bow flat, so I made one out of two seperate pieces of ribbon. First, each piece was folded into an awareness ribbon shape, and the point of contact was secured with a dab of hot glue. Then, I glued the two together.

ribbon bow


5. Next, I looped a length of ribbon around the top of the wreath, and secured the ends together with another dab of hot glue. Before securing, I made sure that the loop was arranged in a way so that the wreath would lie flat against the wall (not pictured, sorry). I attached my bow to the ribbon loop with glue.

6. To hang my wreath, I used a decorative thumbtack that I had on hand. I stabbed the thumbtack through the center of the bow, and I think it finished the bow off nicely since it didn't really have a center. If you are planning on hanging your wreath somewhere other than a wall, you may want to use a button or something similar that doesn't have a pokey end sticking out the back.

ribbon bow


7. Hang in the location of your choice! I chose to put it above the french doors in our living room.

toilet paper christmas wreath

I hope you liked this quick and easy tutorial!

It's December! Winter Window Dressing.

December 1, 2011

If you're new to the blog, you might not be aware of how much I love my windows. They might look like junk right now, but I love the light they bring into the house, and I know that with a little bit of work they can look fabulous again.

With that in mind, I knew I wanted to give one of the windows in the living room a bit of a face lift for the holiday season.

If you read my last Christmas decorating post, you know that I took apart my original Christmas centerpiece, because it was driving me crazy. This is where the painted styro foam balls from that project ended up:

glass vase Christmas decoration

I hate this vase. No matter what I put in it, it's just not a shape that I like looking at. So out came the balls, and the vase went into the basket that's destined for Goodwill donation.

The painted styro foam balls got a makeover, in the form of a little bit of ribbon held in place with a straight pin.

home made christmas ornament

I added some thread (although I would rather have used fishing line) and I got...


I bought a sheet of 97 cent window clings from Walmart to fill in the gaps and make it a little more cohesive than random floating balls.

I used two tension rods (around $9 a piece, which I bought for a future, after Christmas, project) to hang the balls in the window frame. I used varying lengths of thread to get some definition, which was attached to the styro foam balls using fabric glue. 

It was so hard to get a good picture of this! I'm going to have to learn how to shoot on something other than auto one day...

The other Christmas decorations that I plan on putting out have been brought up from the basement, and Tahsis seems to find the whole thing perplexing. Also, yes, Lumpy the Ottoman still lives.

christmas decorations dog

Is anyone else decorating this weekend?

I linked this post up to...

The Shabby Nest

Simple Christmas Centerpiece

November 24, 2011

Some of you might remember that at the beginning of the month, I participated in a Pinterest Challenge. I went to Michael's, spent way too much money, and put together a centerpiece. You can check it out here.

It wasn't long before I decided that I hated it. It wasn't easy to move around, it was too busy, and it wasn't symmetrical and therefore the person sitting on one side of the table got a better view than the other. When I say it wasn't long, it was less than a week before I had it dismantled.

I hummed and hawed about how I could add a little bit of Christmas into the kitchen without making the room even busier (we have A LOT of stuff in our kitchen). We also have a pretty small table, so I wanted something a little more compact.

I had some epsom salt left over from making our Christmas "mantel", so I thought I would put that to use (I've kept the bottle, though, so that I can keep all of the salt for next year!). I also had an empty fish bowl, that was part of the centerpiece at a friend's wedding.

With just a few other supplies, this...

Simple Christmas Centerpiece


...became this!

simple christmas centerpiece


It feels so much better than my first try. Cleaner, simpler, but still a little bit of Christmas sparkle.

simple christmas centerpiece


I will not do a fully decorated Christmas table until December (I'm going to try my best to hold off, at least!), so the centerpiece is a nice little transition from fall to winter.

simple christmas centerpiece


Any big plans for anyone this weekend? Not much for us over here...except the barn is being buried!


Although it's hard to tell, that's an excavator, digging a big ol' hole.

Have a great weekend!

P.S. Once again, the epsom salt idea was borrowed from The Inspired Room.

I linked this post up to...

The Shabby Nest

Cheapest Christmas Wreath Ever

November 23, 2011

There are wreaths galore all over blogland and Pinterest for every imaginable season, so I figured I'd give it a shot and see what I could come up with for Christmas (I totally missed the boat on all Fall decorating! Well, except for this).

Can you tell what it's made of?

toilet paper christmas wreath
Please ignore the crack in the paint - all of our walls are hundred year old horse hair plaster that expands and contracts with the seasons!

toilet paper christmas wreath

Yep, toilet paper.

toilet paper christmas wreath

And a little (maybe a lot) of hot glue...

ribbon bow

And some ribbon and a thumb tack...

toilet paper christmas wreath 

Voila! Cheapest wreath ever - I spent 0 dollars.

The idea for using pipe insulation for a wreath form came from Pinterest. I think this is the original source.

Now I'm going to tell you something embarassing. Mike and I snagged a "hot water efficient" shower head of some sort at a home show (before we even owned the house), and a bunch of pieces of foam pipe insulation was included in the kit. When we bought our house, I went on a rampage and put that foam on every single pipe in the basement. Yep, even the cold water lines. Hey - I was a new home owner, what did I know!

Other fun facts:

Our woodwork is not stained wood. It's faux bois - "fake wood". In other words, painted to look like wood. All of the wood in our house (with the exception being the kitchen floor) is pine. The wood in the living room, lower hall and upper hall is painted to look like quarter sawn oak. This was apparently all the rage if you were a proper Victorian but didn't have the cashola for nice wood like oak, mahogany, walnut, etc. Ontario is notorious for it's pine forests, so it shouldn't be surprising that A LOT of old houses have faux bois woodwork.
See the slide bolt in the last photo, that's keeping the french door in place? If you look closely, you'll see that it alternates in colour from bronze to black to bronze and so on. This is intentional, and is seen frequently on antique hardware. The look is called japaned (I don't know why!).

If you'd like more details on how to make a wreath outta toilet paper, check out the tutorial here.

Pin It

I've linked this post up to:
The DIY Show Off


Photobucket

HookingupwithHoH
Everything Under the Moon

Our Christmas "Mantel"

November 17, 2011

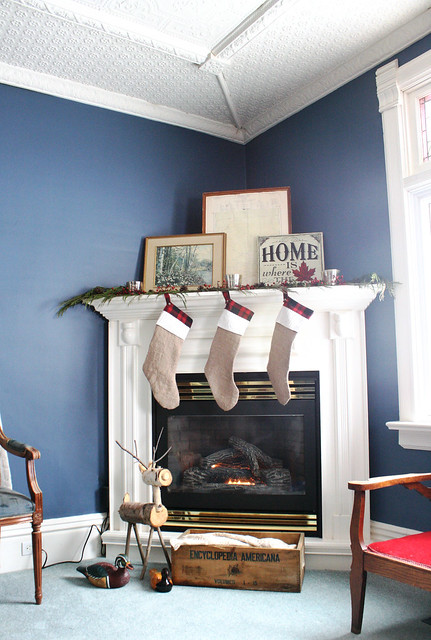
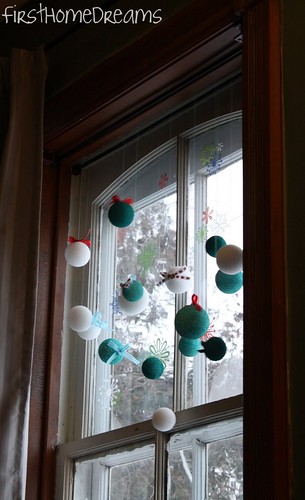
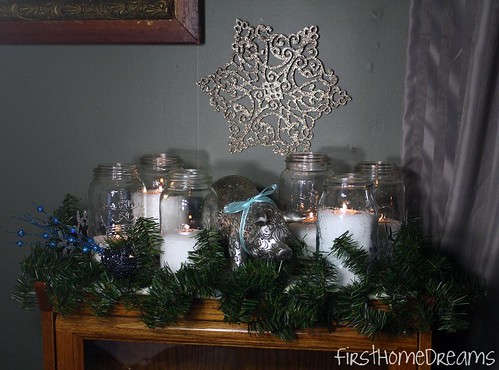
One of the (many) things that our simple Victorian farmhouse lacks when compared to it's more interesting counterparts is a fireplace.

What we do have is a nice oak barrister bookcase. It's not an antique piece, but Mike did pick it and it's twin up at an auction for around $40 each. Not bad, not bad.

Anyway, I decided that the top of the barrister bookcase would be Christmas mantel. And as soon as I decided that, I couldn't wait to decorate it. Last year was our first Christmas in the house, so we just sort of threw everything that had been given to us out in the living room and called it a day. I'm hoping to be a little more structured this year!

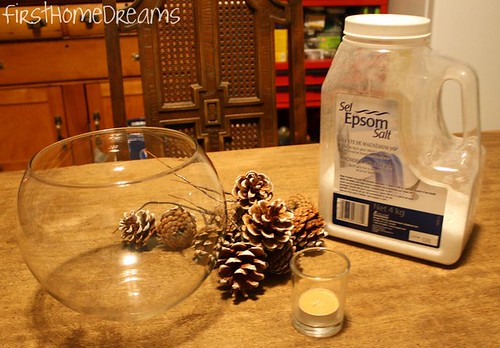
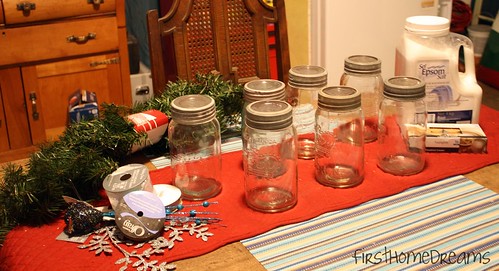
So I hit up Walmart for supplies (because you should never go to Michael's without a coupon):

christmas mantel

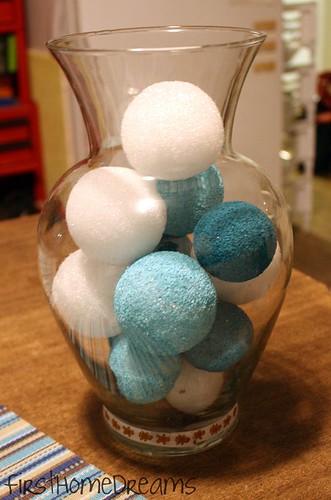
The vintage Crown fruit jars were a recent find at Goodwill, but I bought fake pine garland ($2.96), scented tea lights ($3.00), 4 ornaments ($1.96 each), epsom salt ($7.96), and 3 spools of ribbon (2 at $2.50 and 1 at $2.96). I spent around $35 after taxes (and a bag of mini eggs!), but I don't mind because so much of it will be used again, and the ribbon can be used throughout the year since I didn't buy Christmas specific.

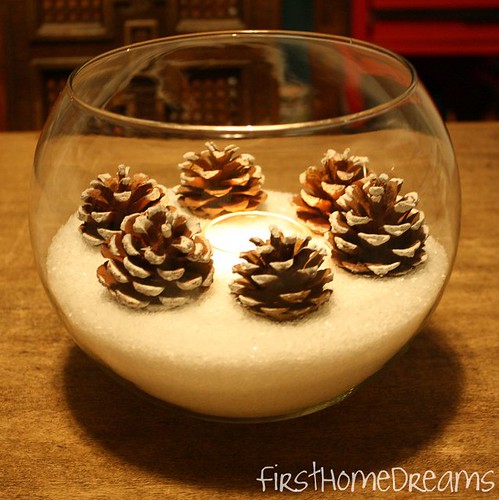
Thanks to Melissa over at The Inspired Room, I knew I wanted to use epsom salt as "snow" in my Crown jars with the tea lights (see her's here).

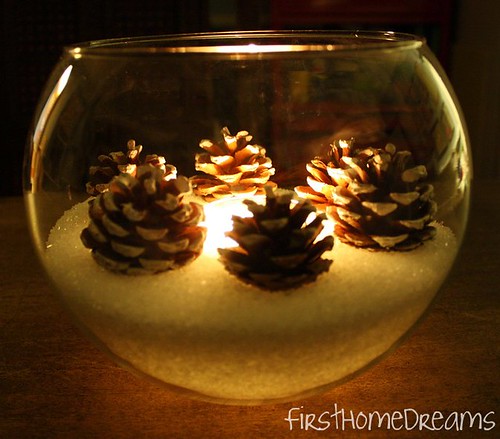
Without further ado, our Christmas "mantel"!

vintage fruit jar crown mason christmas mantel

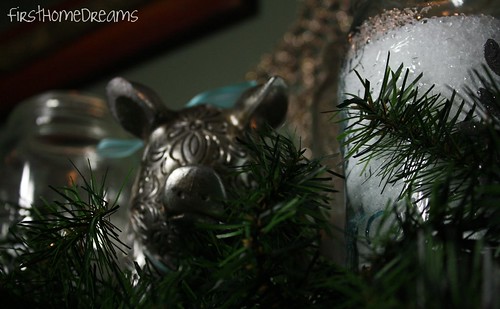
Nope, your eyes don't deceive you. That's Piggers playing the part of Christmas Ham (ha!).

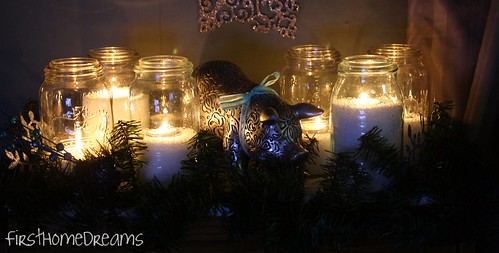
A little lights out action:


Isn't this little guy cute?


So shiny!

vintage fruit jar crown mason christmas

And I think Piggers fits in just fine. He's shiny too, and has a pretty bow.


Snort!

The fake pine garland was really nice to work with - it came in one really long strand, and it's made of wire so that it bends easily. It was great for getting it to sit where I wanted on the bookcase.

At first I had the jars all sitting right on the top of the bookcase, but I decided to stagger them a little more. I added coasters and subways tiles underneath to get different heights.

Has anyone else started their Christmas decorating yet? This is the only thing I'll do for awhile yet - not feeling ready to go dig the other decorations out of the basement!

I've linked up to:

The DIY Show Off


The Shabby Nest


P.S. Posting every weekday is exhausting! I just can't keep up with it with working full time and having boring ol' chores to take care of. In an effort to produce regular good content, I'm going to only post on Mondays, Wednesdays, and Fridays. Cheers!

Blog Design by Nudge Media Design | Powered by Blogger