
Unfortunately, I'm a bit under the weather this week, so until I'm feeling better (and actually DOING stuff), my posts will be short and sweet.
Today, I'm hoping you'll check out Old Town Home's 1st Annual DIY Gingerbread House Challenge.
If you've never checked out this blog before, I highly encourage you to do so, especially if you live in an older home and are doing renovations/restoration. You won't regret it!
Cyber Monday
November 28, 2011
This weekend was full of reading and being social, rather than DIYing and being productive.
So I don't have a post for you today. But I DO have a video for you to take a gander at...it might help you understand why I'm restoring my windows rather than replacing them.
The Window Salesman (redirects to http://www.xtranormal.com/watch/11515585/the-window-salesman).
Have a happy Monday!
So I don't have a post for you today. But I DO have a video for you to take a gander at...it might help you understand why I'm restoring my windows rather than replacing them.
The Window Salesman (redirects to http://www.xtranormal.com/watch/11515585/the-window-salesman).
Have a happy Monday!
Simple Christmas Centerpiece
November 24, 2011
Some of you might remember that at the beginning of the month, I participated in a Pinterest Challenge. I went to Michael's, spent way too much money, and put together a centerpiece. You can check it out here.
It wasn't long before I decided that I hated it. It wasn't easy to move around, it was too busy, and it wasn't symmetrical and therefore the person sitting on one side of the table got a better view than the other. When I say it wasn't long, it was less than a week before I had it dismantled.
I hummed and hawed about how I could add a little bit of Christmas into the kitchen without making the room even busier (we have A LOT of stuff in our kitchen). We also have a pretty small table, so I wanted something a little more compact.
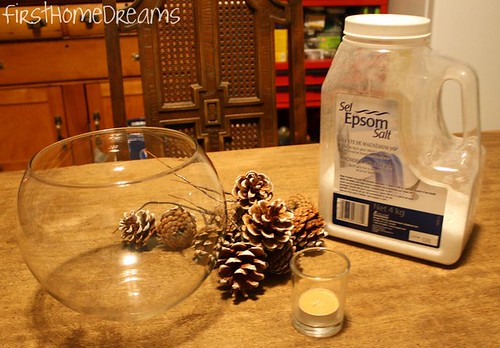
I had some epsom salt left over from making our Christmas "mantel", so I thought I would put that to use (I've kept the bottle, though, so that I can keep all of the salt for next year!). I also had an empty fish bowl, that was part of the centerpiece at a friend's wedding.
With just a few other supplies, this...
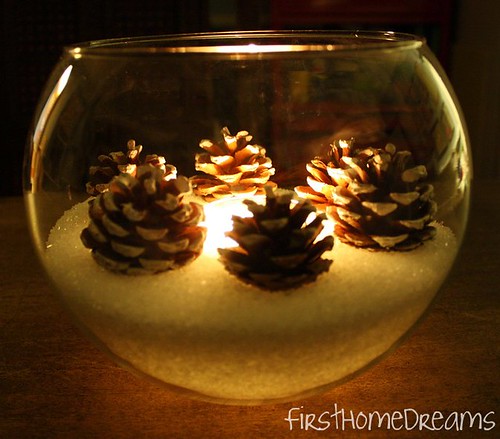
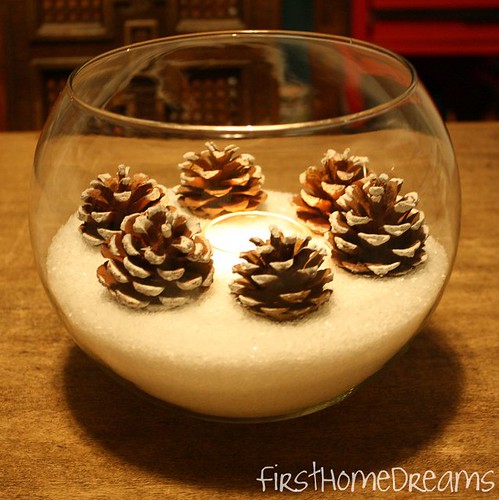
...became this!

It feels so much better than my first try. Cleaner, simpler, but still a little bit of Christmas sparkle.
I will not do a fully decorated Christmas table until December (I'm going to try my best to hold off, at least!), so the centerpiece is a nice little transition from fall to winter.
Any big plans for anyone this weekend? Not much for us over here...except the barn is being buried!

Although it's hard to tell, that's an excavator, digging a big ol' hole.
Have a great weekend!
P.S. Once again, the epsom salt idea was borrowed from The Inspired Room.
I linked this post up to...

It wasn't long before I decided that I hated it. It wasn't easy to move around, it was too busy, and it wasn't symmetrical and therefore the person sitting on one side of the table got a better view than the other. When I say it wasn't long, it was less than a week before I had it dismantled.
I hummed and hawed about how I could add a little bit of Christmas into the kitchen without making the room even busier (we have A LOT of stuff in our kitchen). We also have a pretty small table, so I wanted something a little more compact.
I had some epsom salt left over from making our Christmas "mantel", so I thought I would put that to use (I've kept the bottle, though, so that I can keep all of the salt for next year!). I also had an empty fish bowl, that was part of the centerpiece at a friend's wedding.
With just a few other supplies, this...
...became this!
It feels so much better than my first try. Cleaner, simpler, but still a little bit of Christmas sparkle.
I will not do a fully decorated Christmas table until December (I'm going to try my best to hold off, at least!), so the centerpiece is a nice little transition from fall to winter.
Any big plans for anyone this weekend? Not much for us over here...except the barn is being buried!

Have a great weekend!
P.S. Once again, the epsom salt idea was borrowed from The Inspired Room.
I linked this post up to...
Cheapest Christmas Wreath Ever
November 23, 2011
There are wreaths galore all over blogland and Pinterest for every imaginable season, so I figured I'd give it a shot and see what I could come up with for Christmas (I totally missed the boat on all Fall decorating! Well, except for this).
Can you tell what it's made of?


Yep, toilet paper.
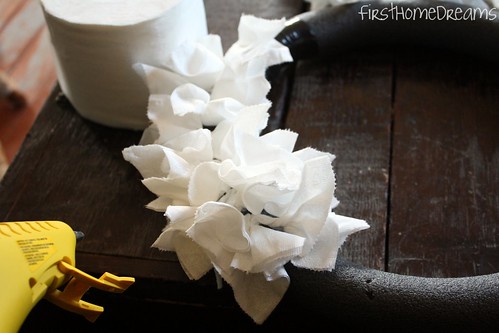
And a little (maybe a lot) of hot glue...

And some ribbon and a thumb tack...

Voila! Cheapest wreath ever - I spent 0 dollars.
The idea for using pipe insulation for a wreath form came from Pinterest. I think this is the original source.
Now I'm going to tell you something embarassing. Mike and I snagged a "hot water efficient" shower head of some sort at a home show (before we even owned the house), and a bunch of pieces of foam pipe insulation was included in the kit. When we bought our house, I went on a rampage and put that foam on every single pipe in the basement. Yep, even the cold water lines. Hey - I was a new home owner, what did I know!
Other fun facts:
Our woodwork is not stained wood. It's faux bois - "fake wood". In other words, painted to look like wood. All of the wood in our house (with the exception being the kitchen floor) is pine. The wood in the living room, lower hall and upper hall is painted to look like quarter sawn oak. This was apparently all the rage if you were a proper Victorian but didn't have the cashola for nice wood like oak, mahogany, walnut, etc. Ontario is notorious for it's pine forests, so it shouldn't be surprising that A LOT of old houses have faux bois woodwork.
See the slide bolt in the last photo, that's keeping the french door in place? If you look closely, you'll see that it alternates in colour from bronze to black to bronze and so on. This is intentional, and is seen frequently on antique hardware. The look is called japaned (I don't know why!).
If you'd like more details on how to make a wreath outta toilet paper, check out the tutorial here.
Pin It
I've linked this post up to:


Can you tell what it's made of?
Please ignore the crack in the paint - all of our walls are hundred year old horse hair plaster that expands and contracts with the seasons!
Yep, toilet paper.
And a little (maybe a lot) of hot glue...
And some ribbon and a thumb tack...
Voila! Cheapest wreath ever - I spent 0 dollars.
The idea for using pipe insulation for a wreath form came from Pinterest. I think this is the original source.
Now I'm going to tell you something embarassing. Mike and I snagged a "hot water efficient" shower head of some sort at a home show (before we even owned the house), and a bunch of pieces of foam pipe insulation was included in the kit. When we bought our house, I went on a rampage and put that foam on every single pipe in the basement. Yep, even the cold water lines. Hey - I was a new home owner, what did I know!
Other fun facts:
Our woodwork is not stained wood. It's faux bois - "fake wood". In other words, painted to look like wood. All of the wood in our house (with the exception being the kitchen floor) is pine. The wood in the living room, lower hall and upper hall is painted to look like quarter sawn oak. This was apparently all the rage if you were a proper Victorian but didn't have the cashola for nice wood like oak, mahogany, walnut, etc. Ontario is notorious for it's pine forests, so it shouldn't be surprising that A LOT of old houses have faux bois woodwork.
See the slide bolt in the last photo, that's keeping the french door in place? If you look closely, you'll see that it alternates in colour from bronze to black to bronze and so on. This is intentional, and is seen frequently on antique hardware. The look is called japaned (I don't know why!).
If you'd like more details on how to make a wreath outta toilet paper, check out the tutorial here.
Pin It
I've linked this post up to:
Bonfire Times Ten
November 21, 2011
Although it's pretty much winter already, there's nothing like saying goodbye to fall with a bonfire.
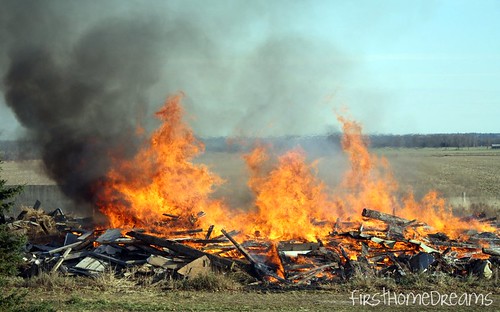
How about a really, really big bonfire?
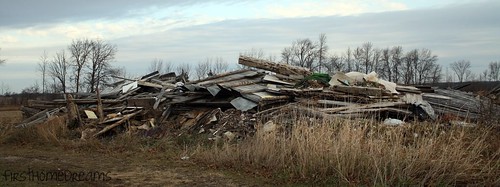
In the spring, when we cleaned up the shack that collapsed, the majority of the scrap was added to the pile at the edge of our property line. That existing pile was a barn that had been torn down. I'm fairly certain this barn was as old as the house, because the 1901 census tells us there was at least 2 outbuildings on the property. I *think* I know where the other one was, but I can't be sure. It's a little sad that it wasn't saved, but what's done is done (and I never had a chance to see the barn intact so I don't know how far gone it was).
Moving on. Here's a look at what we've been seeing every time we pulled in the driveway.
Saturday morning, the farmer who owns the field around us came by to let me know that he was going to be getting rid of that pile. I was a little bummed - Mike was at work so he was going to miss the action, and I was hoping for a little more notice so that we could have some people over. Oh well, not the end of the world.
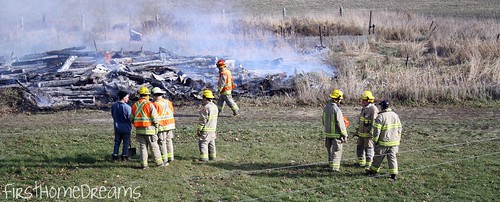
It wasn't long before the whole thing was engulfed in flames.
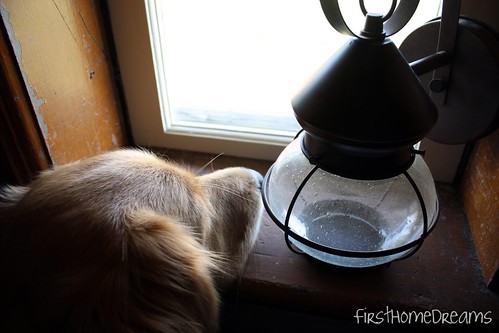
Tahsis was pretty intrigued by all the action, and kept looking out the window (check out this post to see a before and after of this window's rehab).
And then, the fire department arrived. The farmer who was burning did get the go ahead the day before, and the department was supposed to inform dispatch so that when someone called in, they didn't come speeding out here. Well, that didn't happen.

I tried to get a picture after the sun had gone down - the embers looked really cool! But I don't know how to use the camera on anything but automatic so it wasn't working out. This is what we were left with the following morning, though.
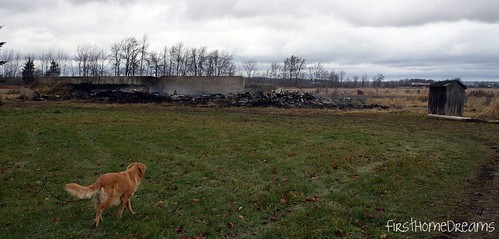
To finish the job, the farmer is going to get someone in to bury what's left. I'm not sure when that will happen, but eventually crops will grow here. Pretty cool if you ask me!
How about a really, really big bonfire?
In the spring, when we cleaned up the shack that collapsed, the majority of the scrap was added to the pile at the edge of our property line. That existing pile was a barn that had been torn down. I'm fairly certain this barn was as old as the house, because the 1901 census tells us there was at least 2 outbuildings on the property. I *think* I know where the other one was, but I can't be sure. It's a little sad that it wasn't saved, but what's done is done (and I never had a chance to see the barn intact so I don't know how far gone it was).
Moving on. Here's a look at what we've been seeing every time we pulled in the driveway.
Saturday morning, the farmer who owns the field around us came by to let me know that he was going to be getting rid of that pile. I was a little bummed - Mike was at work so he was going to miss the action, and I was hoping for a little more notice so that we could have some people over. Oh well, not the end of the world.
It wasn't long before the whole thing was engulfed in flames.
Tahsis was pretty intrigued by all the action, and kept looking out the window (check out this post to see a before and after of this window's rehab).
And then, the fire department arrived. The farmer who was burning did get the go ahead the day before, and the department was supposed to inform dispatch so that when someone called in, they didn't come speeding out here. Well, that didn't happen.
I tried to get a picture after the sun had gone down - the embers looked really cool! But I don't know how to use the camera on anything but automatic so it wasn't working out. This is what we were left with the following morning, though.
To finish the job, the farmer is going to get someone in to bury what's left. I'm not sure when that will happen, but eventually crops will grow here. Pretty cool if you ask me!
Our Christmas "Mantel"
November 17, 2011
One of the (many) things that our simple Victorian farmhouse lacks when compared to it's more interesting counterparts is a fireplace.
What we do have is a nice oak barrister bookcase. It's not an antique piece, but Mike did pick it and it's twin up at an auction for around $40 each. Not bad, not bad.
Anyway, I decided that the top of the barrister bookcase would be Christmas mantel. And as soon as I decided that, I couldn't wait to decorate it. Last year was our first Christmas in the house, so we just sort of threw everything that had been given to us out in the living room and called it a day. I'm hoping to be a little more structured this year!
So I hit up Walmart for supplies (because you should never go to Michael's without a coupon):
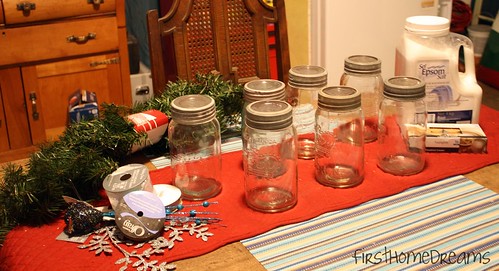
The vintage Crown fruit jars were a recent find at Goodwill, but I bought fake pine garland ($2.96), scented tea lights ($3.00), 4 ornaments ($1.96 each), epsom salt ($7.96), and 3 spools of ribbon (2 at $2.50 and 1 at $2.96). I spent around $35 after taxes (and a bag of mini eggs!), but I don't mind because so much of it will be used again, and the ribbon can be used throughout the year since I didn't buy Christmas specific.
Thanks to Melissa over at The Inspired Room, I knew I wanted to use epsom salt as "snow" in my Crown jars with the tea lights (see her's here).
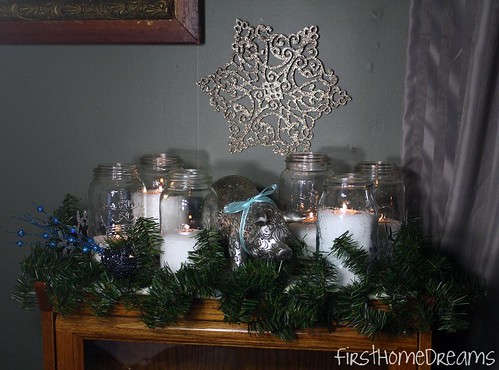
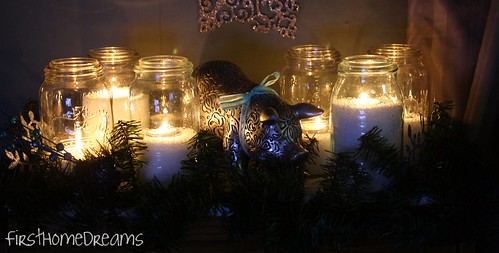
Without further ado, our Christmas "mantel"!
Nope, your eyes don't deceive you. That's Piggers playing the part of Christmas Ham (ha!).
A little lights out action:
Isn't this little guy cute?
So shiny!

And I think Piggers fits in just fine. He's shiny too, and has a pretty bow.
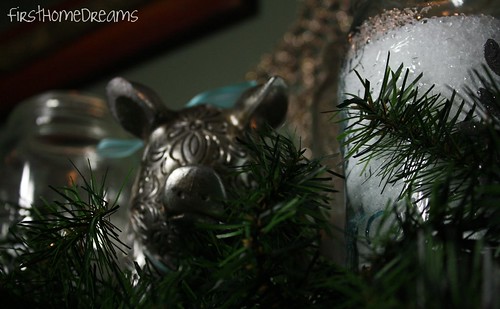
The fake pine garland was really nice to work with - it came in one really long strand, and it's made of wire so that it bends easily. It was great for getting it to sit where I wanted on the bookcase.
At first I had the jars all sitting right on the top of the bookcase, but I decided to stagger them a little more. I added coasters and subways tiles underneath to get different heights.
Has anyone else started their Christmas decorating yet? This is the only thing I'll do for awhile yet - not feeling ready to go dig the other decorations out of the basement!
I've linked up to:


P.S. Posting every weekday is exhausting! I just can't keep up with it with working full time and having boring ol' chores to take care of. In an effort to produce regular good content, I'm going to only post on Mondays, Wednesdays, and Fridays. Cheers!
What we do have is a nice oak barrister bookcase. It's not an antique piece, but Mike did pick it and it's twin up at an auction for around $40 each. Not bad, not bad.
Anyway, I decided that the top of the barrister bookcase would be Christmas mantel. And as soon as I decided that, I couldn't wait to decorate it. Last year was our first Christmas in the house, so we just sort of threw everything that had been given to us out in the living room and called it a day. I'm hoping to be a little more structured this year!
So I hit up Walmart for supplies (because you should never go to Michael's without a coupon):
The vintage Crown fruit jars were a recent find at Goodwill, but I bought fake pine garland ($2.96), scented tea lights ($3.00), 4 ornaments ($1.96 each), epsom salt ($7.96), and 3 spools of ribbon (2 at $2.50 and 1 at $2.96). I spent around $35 after taxes (and a bag of mini eggs!), but I don't mind because so much of it will be used again, and the ribbon can be used throughout the year since I didn't buy Christmas specific.
Thanks to Melissa over at The Inspired Room, I knew I wanted to use epsom salt as "snow" in my Crown jars with the tea lights (see her's here).
Without further ado, our Christmas "mantel"!
Nope, your eyes don't deceive you. That's Piggers playing the part of Christmas Ham (ha!).
A little lights out action:
Isn't this little guy cute?

So shiny!
And I think Piggers fits in just fine. He's shiny too, and has a pretty bow.

Snort!
The fake pine garland was really nice to work with - it came in one really long strand, and it's made of wire so that it bends easily. It was great for getting it to sit where I wanted on the bookcase.
At first I had the jars all sitting right on the top of the bookcase, but I decided to stagger them a little more. I added coasters and subways tiles underneath to get different heights.
Has anyone else started their Christmas decorating yet? This is the only thing I'll do for awhile yet - not feeling ready to go dig the other decorations out of the basement!
I've linked up to:
P.S. Posting every weekday is exhausting! I just can't keep up with it with working full time and having boring ol' chores to take care of. In an effort to produce regular good content, I'm going to only post on Mondays, Wednesdays, and Fridays. Cheers!
Building Our Bathroom Vanity - Mini Update + PSA
November 16, 2011
I mentioned in my last post that buying a open concept sink vanity was way out of our budget. Just in case you were wondering what those suckers can cost, take a look here and here.
Kind of outrageous, right?
Anyway, I've made a little bit more progress on building our own vanity.
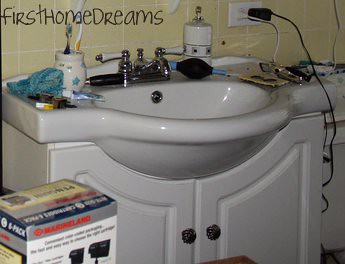
Using the same dimensions as the old sink vanity for a guide (30 1/4" x 11 1/4"), I cut a regular ol' 2x4 into appropriately sized pieces.
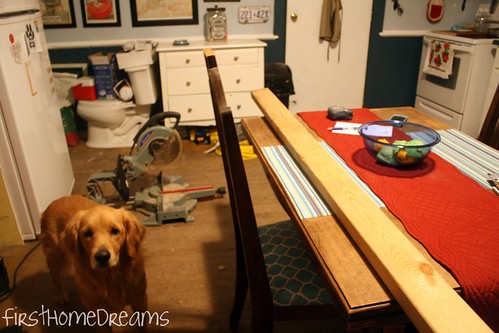
Can you tell that our kitchen doubles as a workshop and reno storage? The downside of having a huge kitchen! Also, can you spot the new addition on the gallery wall?
And then I ran out of steam because after work I was running around collecting bottles and cans for a friend who is raising money to participate in the 13th annual Kelly Shires Foundation Breast Cancer Snow Run. The Snow Run is a women only snowmobile weekend, and participants have to raise at least $1250 to be eligble to participate.
The Kelly Shires Foundation was created by Kelly Shires, a woman who lost her battle against breast cancer in 2004, eight years after being diagnosed. The foundation was born out of her realization that many of the costs associated with breast cancer treatment were financially burdening - things that health insurance doesn't cover like wigs, arranging for home care, child counselling, prosthetics, transportation to treatments and subsequent lodging and parking costs (which can be brutal - the hospital in my area charges $15 a day!), and much more.
The Kelly Shires Foundation puts all funds raised in trust, and women are able to make applications for money online and over the phone. Applications are reviewed by a council and approved on a case by case basis. The foundation also donates money to breast cancer centers in hospitals.
Breast cancer hits close to home - my granny had breast cancer. Mike's grandma has breast cancer. A close friend's mom had breast cancer. Thankfully, they all survived (although my granny and Mike's grandma are no longer with us).
I'm thinking I'd like a snowmobile to be able to participate in the snow run one year...
Anyway, I'm hoping to have this sink vanity done Thursday evening so that I can show it off on Friday, although I'm probably being way optimistic.
Kind of outrageous, right?
Anyway, I've made a little bit more progress on building our own vanity.
Using the same dimensions as the old sink vanity for a guide (30 1/4" x 11 1/4"), I cut a regular ol' 2x4 into appropriately sized pieces.
Can you tell that our kitchen doubles as a workshop and reno storage? The downside of having a huge kitchen! Also, can you spot the new addition on the gallery wall?
And then I ran out of steam because after work I was running around collecting bottles and cans for a friend who is raising money to participate in the 13th annual Kelly Shires Foundation Breast Cancer Snow Run. The Snow Run is a women only snowmobile weekend, and participants have to raise at least $1250 to be eligble to participate.
The Kelly Shires Foundation was created by Kelly Shires, a woman who lost her battle against breast cancer in 2004, eight years after being diagnosed. The foundation was born out of her realization that many of the costs associated with breast cancer treatment were financially burdening - things that health insurance doesn't cover like wigs, arranging for home care, child counselling, prosthetics, transportation to treatments and subsequent lodging and parking costs (which can be brutal - the hospital in my area charges $15 a day!), and much more.
The Kelly Shires Foundation puts all funds raised in trust, and women are able to make applications for money online and over the phone. Applications are reviewed by a council and approved on a case by case basis. The foundation also donates money to breast cancer centers in hospitals.
Breast cancer hits close to home - my granny had breast cancer. Mike's grandma has breast cancer. A close friend's mom had breast cancer. Thankfully, they all survived (although my granny and Mike's grandma are no longer with us).
I'm thinking I'd like a snowmobile to be able to participate in the snow run one year...
Anyway, I'm hoping to have this sink vanity done Thursday evening so that I can show it off on Friday, although I'm probably being way optimistic.
Building Our Bathroom Vanity - Part 1
November 15, 2011
Over this past weekend, I finally got started on building our bathroom vanity. We're renovating on a really tight budget, and since we are completely gutting the bathroom, cutting costs wherever we can is really important. Because of this, we've decided to reuse the current sink and it's faucet - they're really not that bad.
But the vanity? It's cheap looking, poorly made, and provides very little usable storage. We're happy to say goodbye to it.
I knew I didn't want a solid vanity (Mike doesn't care much as long as it's functional!), but everything that could be bought just seemed so expensive. And then I got an idea!
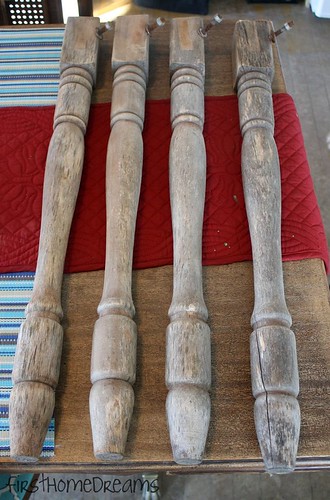
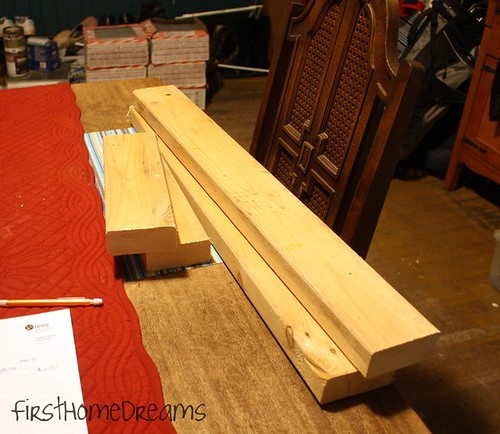
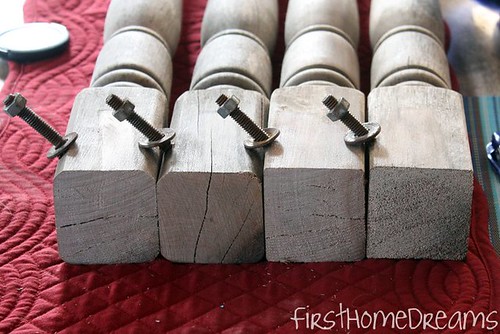
These turned table legs came from an old table sitting outside in the collapsed barn. The rest of the table was beyond saving, but I removed these and they're in pretty good shape beyond some cracks (which I don't mind). They've been sanded smooth, and will be given a coat of primer and paint.
The table legs alone aren't going to hold up the sink, so I have to make some additions (check this post for an idea of what the sink vanity will sorta look like, or a couple of pins on my Bathroom Ideas Pinterest board). But first I had to fix a little problem.
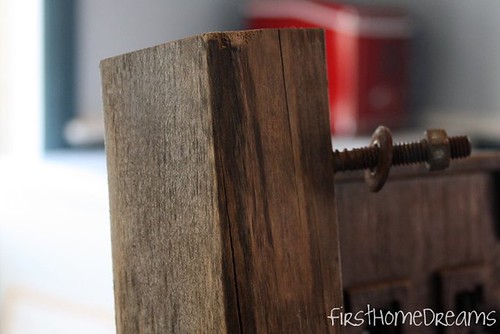
The ends were really not straight! So I measured...

And marked...
And cut!
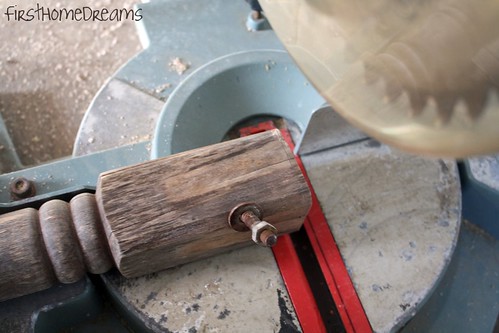
Repeat three more times, and I have four level legs.
Here's a quick look at what still needs to be done:
Please don't mind the clutter, this was when we were moving in the washing machine.
But the vanity? It's cheap looking, poorly made, and provides very little usable storage. We're happy to say goodbye to it.
I knew I didn't want a solid vanity (Mike doesn't care much as long as it's functional!), but everything that could be bought just seemed so expensive. And then I got an idea!
These turned table legs came from an old table sitting outside in the collapsed barn. The rest of the table was beyond saving, but I removed these and they're in pretty good shape beyond some cracks (which I don't mind). They've been sanded smooth, and will be given a coat of primer and paint.
The table legs alone aren't going to hold up the sink, so I have to make some additions (check this post for an idea of what the sink vanity will sorta look like, or a couple of pins on my Bathroom Ideas Pinterest board). But first I had to fix a little problem.
The ends were really not straight! So I measured...
And marked...
And cut!
Repeat three more times, and I have four level legs.
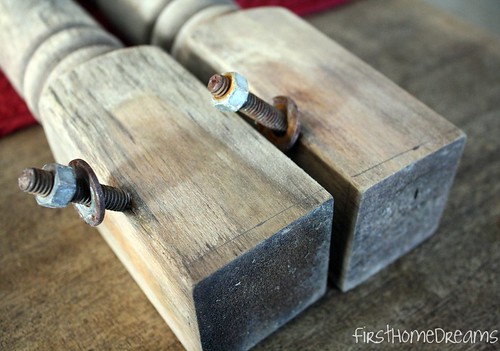
Here's a quick look at what still needs to be done:
- remove bolts, unless I can use them to somehow add strength to the vanity
- add base for sink to rest on (at the same time adding height)
- add a (lower) shelf
- prime
- paint
- add something non-slip to the bottom of each leg
Bathroom Update - We bought tile!
November 14, 2011
Although we still don't have a time frame for when we'll actually start the bathroom overhaul, we've finally made a little bit more progress. You can read previous bathroom-centric posts here and here.
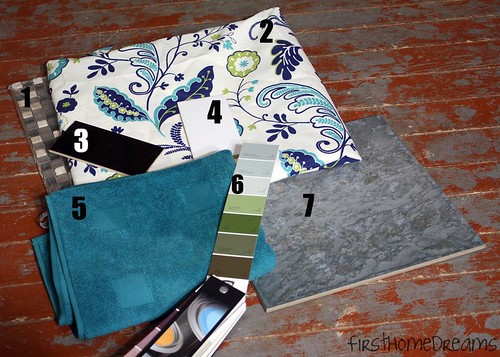
We bought tile! Floor tile. We also made decisions on our wall tile. Here's a shot to give you an idea of our colour scheme.
Isn't our living room floor lovely? Or something.
Let's go through this stuff item by item.
1. Neutral mosaic tile. We knew we wanted to add in a little something to the tile wall to make it stand out, but this stuff can get crazy expensive. This particular mosaic was $14.99 a sheet, and they pretty much go up from there. To keep our budget in check, we're working with just three sheets. More on how that's going down closer to go-time.
2. Bright fabric shades. This is the fabric that our bathroom DIY no sew roman shades are made of. The window is big, at 32" wide by 60" tall, so the fabric has a pretty significant impact on the room - especially since they're always all the way down because of the position of the window.
3. Black subway tile. To break up the wall of white that will be the tile wall, we're incorporating bands of black subway tile. This stuff rings in at just 21 cents a tile at Rona (compared to 32 cents at Home Depot). We love purchasing from Canadian companies!
4. White subway tile. This will be the mainstay of the tile wall. It's clean, classic, and very appropriate for an old house. Because it's ceramic, just like the black tile, it's just 21 cents from Rona.
5. Turquoise bath mat. We went to Ikea a few weekends ago, and this is one of the few items that I bought. I love the bright colour, and for just $6.99, it was a no brainer.
6. Grey paint. The paint chip shown is Benjamin Moore's Wispy Gray (from 2004), which we'll have colour matched to Behr's Premium Ultra Plus (paint and primer in one, which hopefully comes in a kitchen and bath formula). It's actually a little bit more grey in real life as opposed to how it's showing in the picture.
7. Blue/grey floor tile. I've mentioned a couple times around here that we had our hearts set on a dark grey tile. But, they never seemed to go on sale, and were anywhere from $3/sq ft and up. We're working with 93 sq ft of space in the bathroom (plus you always have to buy at least 10% extra, at the very least), and we just aren't able to spend that kind of money. This past week, the Rona flyer was advertising these blue/grey tiles at $1.79/sq ft. We went in to check them out, and were happy to see that they were marked in store even lower, at $1.52! I probably stared at them for 5 minutes before I sorta okayed them. Then we brought over the other tiles to see how they'd work, and I was satisfied that I wasn't going to have a blue ocean-esque bathroom. We'll use a dark grey grout with them rather than a white to hopefully bring out the greyness rather than the blueness.
Our vision of the bathroom has changed a lot since we moved in (see here and here). It's a good thing we're taking our time - otherwise we'd have a space that we weren't head over heels for.
What do you think? I'd love to hear it.
Frivolous Friday!
November 11, 2011
You can find previous Frivolous Fridays here.
I haven't done a Frivolous Friday in awhile, so I figured I'd do a double post today.
This week, I'm lusting after this light from Rejuvenation.

All of the light fixtures sold at Rejuvenation are customizable, and to have this looking the way I'd like for our bathroom (click the picture to see), it comes in at $285 before shipping and taxes. Ouch.
We're settling for something from the Big Orange Box, which is about a fifth of the price. But if money was unlimited (or at least flowed a little more freely), I'd be all over this one.
Have a great weekend, everyone!
I haven't done a Frivolous Friday in awhile, so I figured I'd do a double post today.
This week, I'm lusting after this light from Rejuvenation.
All of the light fixtures sold at Rejuvenation are customizable, and to have this looking the way I'd like for our bathroom (click the picture to see), it comes in at $285 before shipping and taxes. Ouch.
We're settling for something from the Big Orange Box, which is about a fifth of the price. But if money was unlimited (or at least flowed a little more freely), I'd be all over this one.
Have a great weekend, everyone!
A little bit over here, a little bit over there.
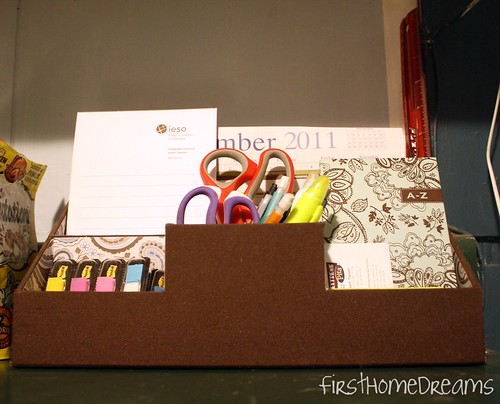
Another organizing/decluttering post for ya!
This little number sits on the kitchen counter by the phone.
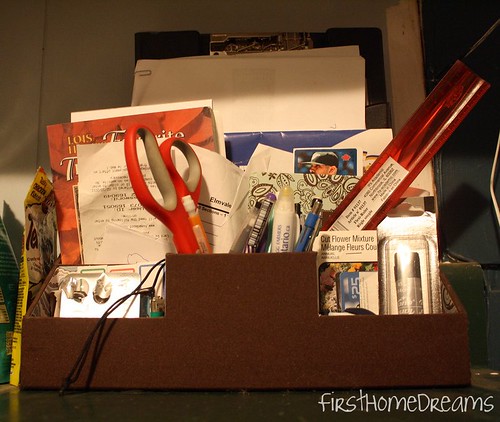
After
I put this up on the wall by the door a few months ago, thinking it would help us keep mail and stuff organized. It didn't. It just got jammed with stuff, and it stuck out way too far from the wall. It was a total bust.
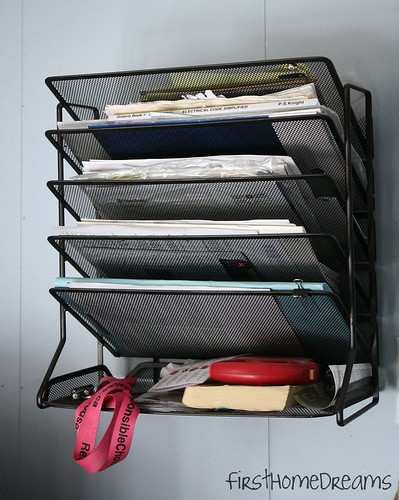
This was how much stuff was in it....most of it was recycled/shredded.
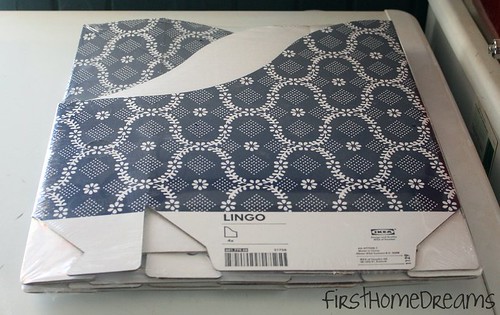
 I grabbed these on sale at Ikea for $1.99.
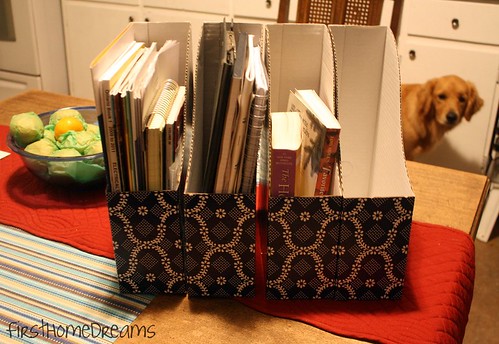
They'll probably make their home in the living room on the bookshelf. Right now they're hanging out on the kitchen counter.
It's such a huge adjustment living with another person and all of their stuff. I wonder if there are people out there who find it totally seamless and unstressful?
On Monday, I'll take a break (a long one) from talking about organizing, and give you a little bathroom update!
Keep in mind that I said little. It won't be anything exhilirating!
In other news...it's snowing!

This little number sits on the kitchen counter by the phone.
Before
After
I put this up on the wall by the door a few months ago, thinking it would help us keep mail and stuff organized. It didn't. It just got jammed with stuff, and it stuck out way too far from the wall. It was a total bust.
Before
This was how much stuff was in it....most of it was recycled/shredded.
After
They'll probably make their home in the living room on the bookshelf. Right now they're hanging out on the kitchen counter.
It's such a huge adjustment living with another person and all of their stuff. I wonder if there are people out there who find it totally seamless and unstressful?
On Monday, I'll take a break (a long one) from talking about organizing, and give you a little bathroom update!
Keep in mind that I said little. It won't be anything exhilirating!
In other news...it's snowing!

Thrifty Thursday
November 10, 2011
I've mentioned before here on the blog that I'm a newbie Pyrex collector. I love the colours, geometric designs, and general nostalgia surrounding the stuff. I hit up the local Goodwill a couple times a month, only because I pass it every day on my way home from work.
I haven't had much luck in the baking dish or mixing bowl department lately, but I made some fun finds of some other pieces!
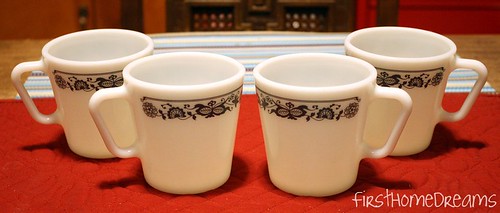
The pattern on these mugs is called Old Town Blue. They were 99 cents each. They remind me of my Granny - she had the same pattern. I miss her.
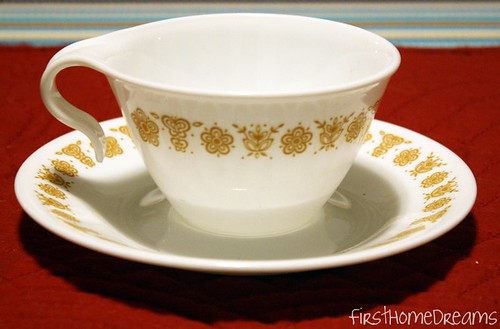
This pattern is known as Butterfly Gold. Each piece of this cup and saucer set was 99 cents. For some reason, they weren't displayed together in the store.
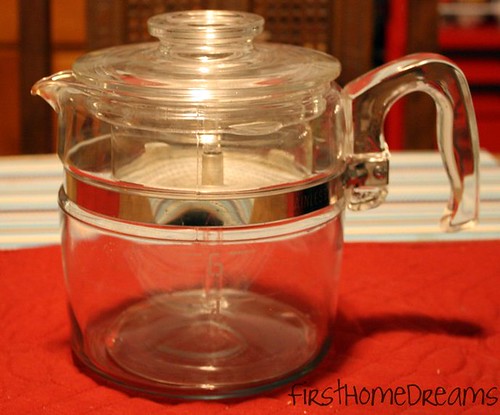
My first piece of Pyrex Flameware! This 6 cup coffee percolator was $5.05. Once I have it cleaned up, I might try it for making my coffee in the mornings...
In addition to Pyrex, I'm a big fan of old glass fruit jars. When I see them in antique shops, they usually range from $5 - $10 depending on the size and colour.
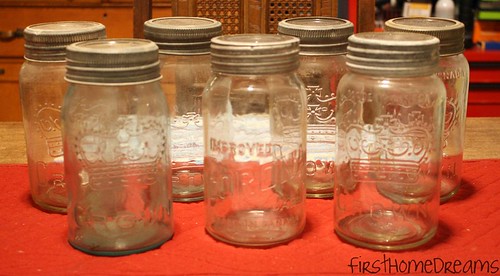
I snagged these lovelies for $1.51 each! There was an 8th glass jar, but I left it behind because it didn't have the nice glass lid that these ones all have. My favourite is this turquoise jar.
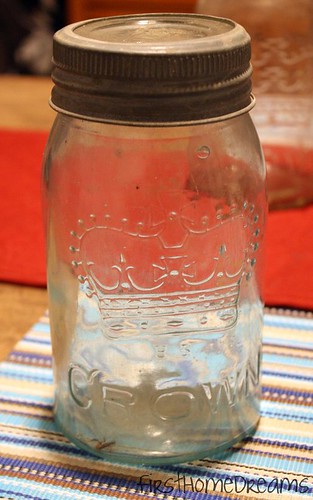
In addition to being turquoise, it also has bubbles in the glass, the sides are wavy rather than smooth, and although there are seams in the sides, they are no where near as clean as those of the other jars.
I'm not sure how to date these Crown fruit jars. Each of the glass lids has a two digit number embossed in the top, and I'm wondering if that indicates the year. The turquoise jar has a 19, and the remaining jars range from 40 to 82. I love that the zinc rings are all in wonderful shape. I found a broken Crown jar when digging in the dirt from where the shack had stood, and there was almost nothing left of the ring.
Now to clean this all up and display it somewhere...
I'm linking up to Her Library Adventures Pyrex Party!

I haven't had much luck in the baking dish or mixing bowl department lately, but I made some fun finds of some other pieces!
The pattern on these mugs is called Old Town Blue. They were 99 cents each. They remind me of my Granny - she had the same pattern. I miss her.
This pattern is known as Butterfly Gold. Each piece of this cup and saucer set was 99 cents. For some reason, they weren't displayed together in the store.
My first piece of Pyrex Flameware! This 6 cup coffee percolator was $5.05. Once I have it cleaned up, I might try it for making my coffee in the mornings...
In addition to Pyrex, I'm a big fan of old glass fruit jars. When I see them in antique shops, they usually range from $5 - $10 depending on the size and colour.
I snagged these lovelies for $1.51 each! There was an 8th glass jar, but I left it behind because it didn't have the nice glass lid that these ones all have. My favourite is this turquoise jar.
In addition to being turquoise, it also has bubbles in the glass, the sides are wavy rather than smooth, and although there are seams in the sides, they are no where near as clean as those of the other jars.
I'm not sure how to date these Crown fruit jars. Each of the glass lids has a two digit number embossed in the top, and I'm wondering if that indicates the year. The turquoise jar has a 19, and the remaining jars range from 40 to 82. I love that the zinc rings are all in wonderful shape. I found a broken Crown jar when digging in the dirt from where the shack had stood, and there was almost nothing left of the ring.
Now to clean this all up and display it somewhere...
I'm linking up to Her Library Adventures Pyrex Party!
Subscribe to:
Posts (Atom)
Blog Design by Nudge Media Design | Powered by Blogger


