Showing posts with label Living Room. Show all posts

Living Room Paint Colour Update

September 11, 2013

Imagine me saying that in the same way Barney Stinson says "I gots to know!".

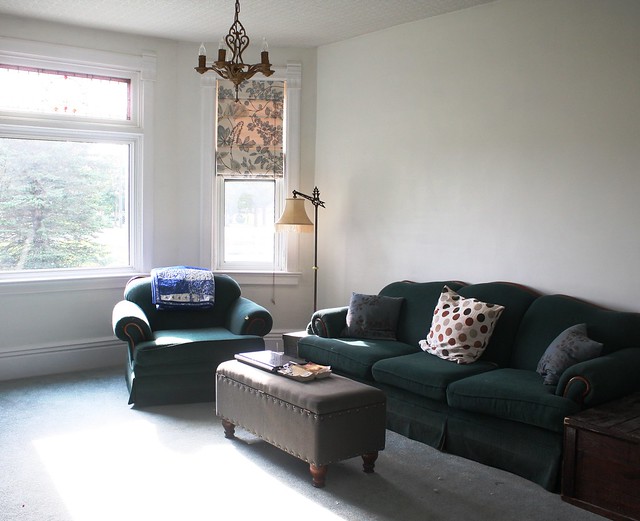
Although our old house still isn't finished and sold, I spent a few bucks (well, a few dozen bucks) on paint and got rid of the dusty rose in the living room once and for all. It's completely different from anything I've ever lived in before, so it's taking me awhile to adjust to it.
para paints white cliffs of dover living room

The walls are White Cliffs of Dover and the trim is Jo Jo (maybe it's Ja Ja) Whitewash, both by Para Paints. Before painting, I patched any holes and cracks with some spackle, and any significant gaps in the trim will eventually get a once over with paintable caulk, but I haven't gotten around to it yet. The difference between plaster in good shape and plaster in bad shape is honestly mind blowing. We will never have to remove the plaster from this house, barring any crazy unforeseen circumstances. Knock on wood!

I decided to keep the walls light and very neutral because the mint-slash-seafoam green carpet is kind of overwhelming, and because I have no colour sense whatsoever, I had a tough time deciding on anything else that would work with it without me feeling like I was living in a clown house. Many many moons from now when we tear up the carpet, looking for original hardwood floors to refinish, I assume I'll go a different direction. But for now this will do just fine. Like I said, I've never had a white room before, so right now it feels a little weird - but it's growing on me. It's better than what it was like when we moved in though, that's for sure.
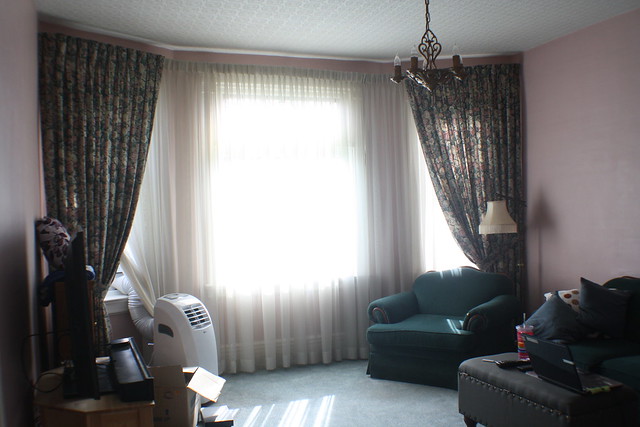
traditional living room before

The living room still has a ways to go. I still need to finish what I started over by the windows, and I have my heart set on new furniture. But on the advice of many people on Twitter, I'm not going to rush that decision even though we have a pretty hefty gift card that I'm itching to use up. I like lists, so here's a "to-do" for the living room.
  • Paint walls and trim
  • Put up crown molding
  • Decide on window treatments - decision made, just need to finish...you can find a post about the roman shades here
  • Buy new couch and loveseat/chair
  • Mount tv and soundbar on wall
  • Find something for underneath the tv to hold electronic gadgets and DVDs
  • Remove a couple of links from the chandelier (Mike can easily bump his head on it) OR consider moving it into a different room and putting something equally awesome in it's place
  • Remove and restore hardware on door
  • Sand down bottom of door so that it's actually functional
I'm sure I've missed a thing or two, but that's basically the gist of it.

So, there's a pretty wordy post for something that could have been summed up with LOOK AT MY NEWLY PAINTED WALLS.


Did you like this post? Click here to subscribe and be notified of new posts. You can also find me on Twitter, Facebook, Bloglovin and Pinterest.
DIY "Custom" Roman Shade

August 22, 2013

Window coverings are expensive. Custom options made with the fabric of your choice are even more costly. While I'd love to be able to afford something custom made by an expert, it's just not realistic for me.

When I first started humming and hawing over what I was going to do to manage light and privacy in the living room, I thought I might use cheap pull down shades behind a fake roman shade. But when I was at Lowes, they had discounted some pretty high quality shades down to $8 from $32. There were only two left in the size that I needed. The problem was, they weren't the same colour.

And then I had an idea...why not layer some fabric that I like over top?

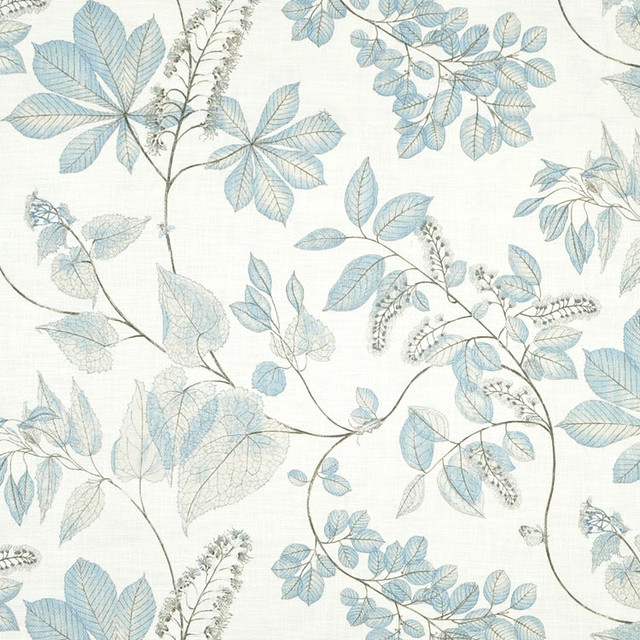
So I grabbed them, and then the next day ordered some fabric samples from Online Fabric Store and Tonic Living. In the end, I ended up ordering the fabric I had been leaning towards since I started browsing - this P. Kaufmann fabric from OFS.

paul kaufmann arboretum cloud
P. Kaufmann Arboretum, Cloud

It didn't take very long to arrive, but they do use UPS to ship so I had a surprise $20 charge at the door. Blerg.

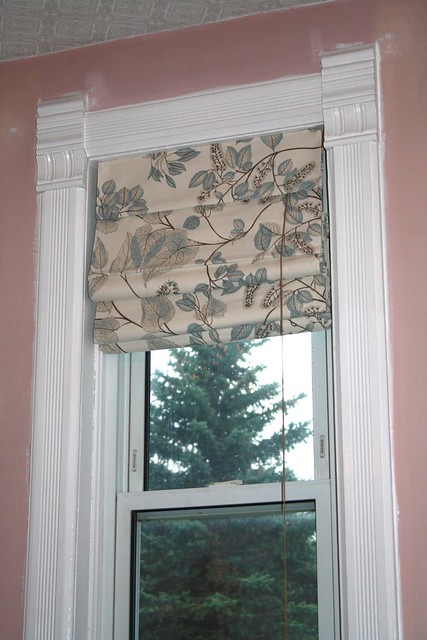
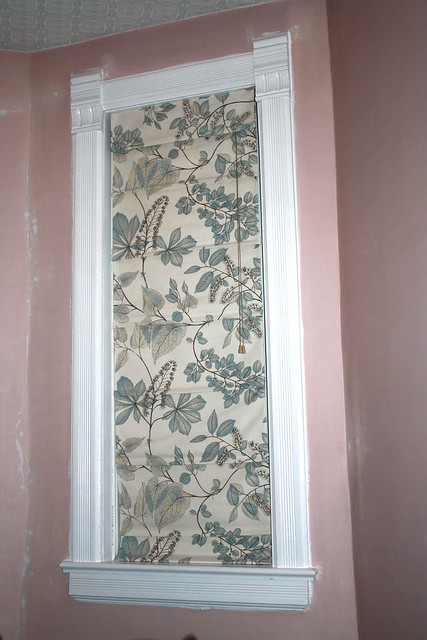
Anyway, here's what they ended up looking like (well, one of them. I just finished the second one before sitting down to write this).

DIY custom roman shadeDIY custom roman shade

I was a little worried that they wouldn't fold up properly with the extra fabric added, but it doesn't seem to be a problem.

Here's how I did it!

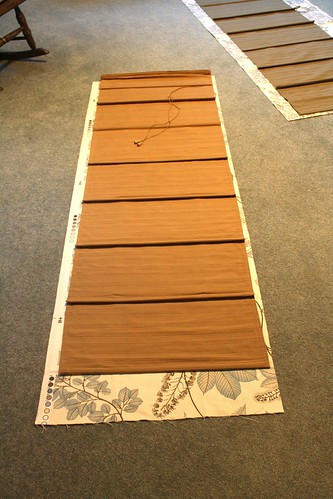
Lay your fabric out, and place your shade over top. Cut around the shade, leaving enough allowance for you to fold over the edges.

new fabric on roman shade

I didn't have as much room as I'd like, because to be honest, I misordered (apparently that's not a word). I always think in meters as opposed to yards. The two yards I ordered just barely, barely covered both shades and their included valances.

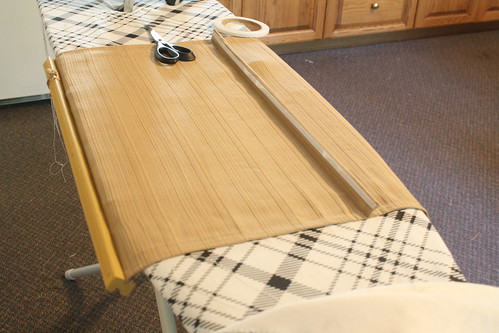
Next, iron out the creases in your fabric. This was the first time I'd used an iron and it was strangely satisfying.

These shades are not no sew, although the amount of sewing is pretty limited. I used iron on fabric fusing tape to adhere the new fabric to the shade.

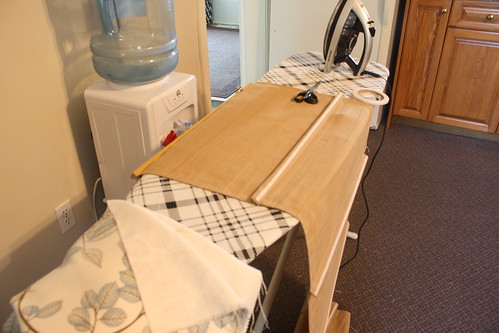
To increase the chances of the shade folding properly, I followed the contour of the original shade. That meant using the tape on both the front face of each folding point, as well as the back side. I hope the pictures below explain what I mean.

fake custom roman shade

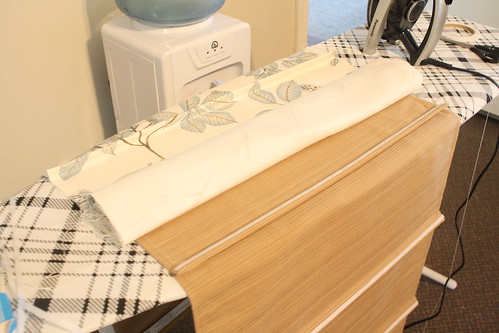
I moved top to bottom, starting by attaching the fabric to the top of the shade. If you're using a patterned fabric, make sure you're attaching things the right way! Although the tape stays tacky enough to move it if you need to, it's still a pain. If you don't have much leeway with your side allowances, really make sure you're smoothing as you go and checking to make sure you have enough room to fold over the edges. I also found it easier to keep the fabric in a roll, rather than flipping it back and forth over and over again.

fake custom roman shade


When I reached the bottom, I didn't do the very bottom edge. To get a nice fold, I decided I would do the sides first. Before starting that, though, I decided to hold the shade up to see how it was taking shape, and I was a little worried. It looked sort of baggy. But once I did the sides, everything tightened up.

Apparently this is where I stopped taking pictures. Use the fabric tape along both sides, and then when you reach the bottom, fold up your finishing edge.

At this point, you'll need to do a few stitches at each point where the fabric folds over the original shade. Otherwise, when you pull the shade up, the extra fabric that isn't secured will puff out the sides. I hope that makes sense?!

My original shades came with valances attached with velcro which cover the mounting hardware. I actually started with these, and entirely hand stitched the new fabric to them. This was a stupid idea. Don't do that. The only other thing to note in regards to the valances is to make sure that when you fold over your edges, make sure you don't cover up the velcro.

If I hadn't hand stitched the valances, this little project would have gone a whole lot faster, but even with that stupid move, it wasn't too bad. And definitely not difficult.

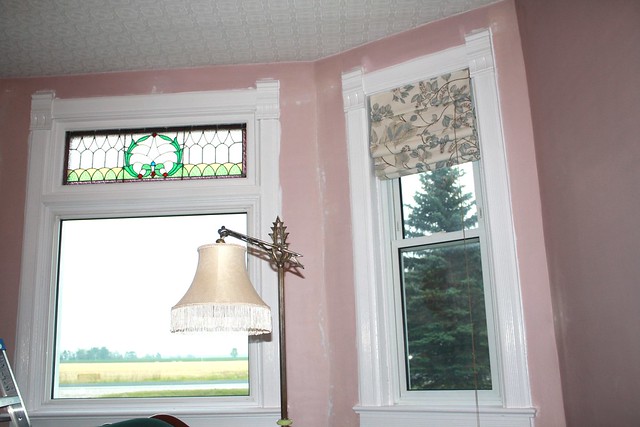
stained glass bay window

In other news, all of the window casings and baseboards have been painted, and I'm hoping to get the walls done this weekend, but don't hold your breath.

Have a good weekend!


Did you like this post? Click here to subscribe and be notified of new posts. You can also find me on Twitter, Facebook, Bloglovin and Pinterest.
Frivolous Friday

August 9, 2013

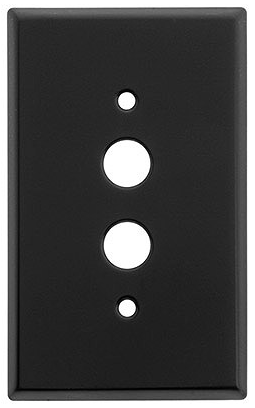
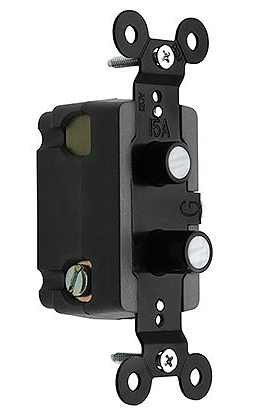
These reproduction push button light switches from House of Antique Hardware makes me happy. I really and truly want them throughout the house, but the price tag is a little scary.

push button switch platepush button light switch


Cost of the actual hardware aside, shipping itself is nearly $50. Outrageous. I'm going to have to poke around on the interwebs to see if I can perhaps find them cheaper, but I'm not going to count on it.


Did you like this post? Click here to subscribe and be notified of new posts. You can also find me on Twitter, Facebook, Bloglovin and Pinterest.
High Hopes

August 7, 2013

This is going to be a disaster.

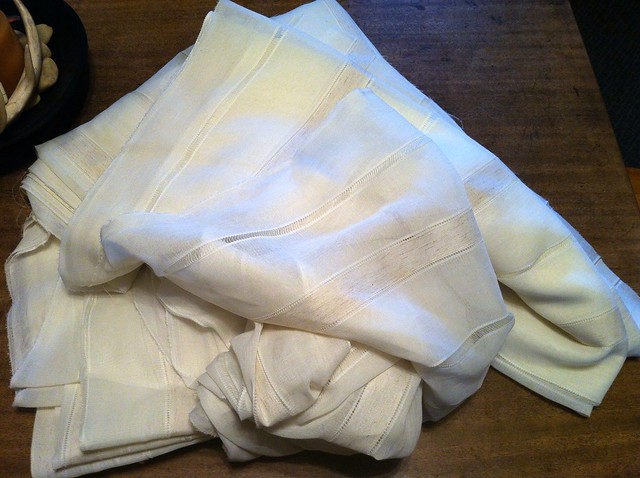
faux linen sheer stripe fabric

Apparently I think I'm going to make this pile of fabric into curtains for the living room.

HA! I should probably dig the sewing machine out of the barn.


Did you like this post? Click here to subscribe and be notified of new posts. You can also find me on Twitter, Facebook, Bloglovin and Pinterest.
Window Dressing Help

August 1, 2013

Decorating savvy friends, I need your help.

In our living room, we have a bay window that is made up of three seperate windows. The big guy in the middle is causing me some grief.

Bay window with stained glass

Don't get me wrong, it's a beautiful window and I feel pretty lucky to have some original stained glass going on in my house. But we need some sort of window covering up there for both privacy and glare reducing tv watching purposes. Same level of priority in my opinion.

The window coverings that were up there when we moved in were way too much. They made the room feel smaller and all of the original details that make me crazy about old houses were completely lost behind dated fabric. I don't want to go down that route again.

I'm thinking of putting roman shades on the two flanking smaller windows and always having them pulled to the same level as the stained glass in the middle window. Since I likely wouldn't ever move them up or down from there, I could save some money and put up some fakers. In behind I could use less fancy pull down shades for some real light blocking capabilities (it's really only a concern for the right window because the sun goes down RIGHT THERE but I like things to be symmetrical).

The sheer curtains that were left here before provided enough privacy for us, so I like the idea of hanging up some updated sheer curtains in between each window, that could be moved to cover the windows as needed. That way I still get to see the molding and stained glass, but can close things up a little bit at night.

We have quite a bit of wall space between each window, so I think it might work out?

Any advice??


Did you like this post? Click here to subscribe and be notified of new posts. You can also find me on Twitter, Facebook, Bloglovin and Pinterest.
Living Room Lift Off

July 9, 2013

With wedding shenanigans officially over (we had a second reception on Saturday night) and work on the old house starting on Friday, I'm feeling a little more free to actually think about how I want things in the new house to look. The first room getting a makeover as soon as the old house is sold is the living room.

living room

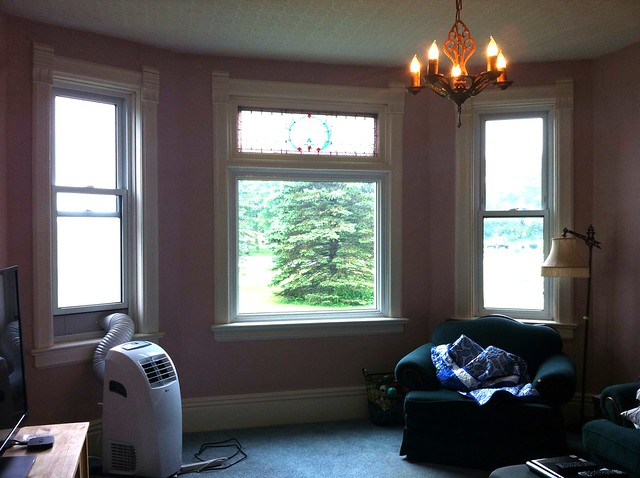
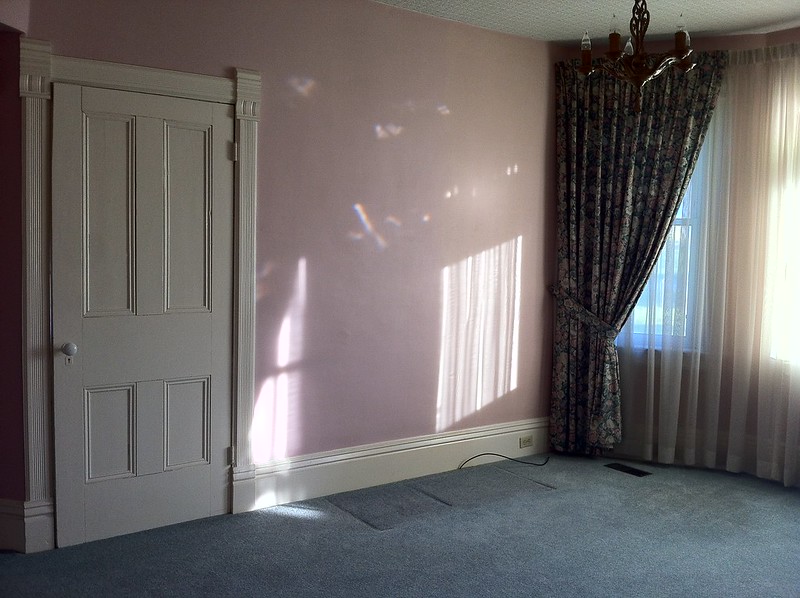
I cannot handle the dusty rose. Or the curtains. Or the mint carpet but I think I'll have to learn to tolerate that for the next 15 to one hundred years. At least it's soft.

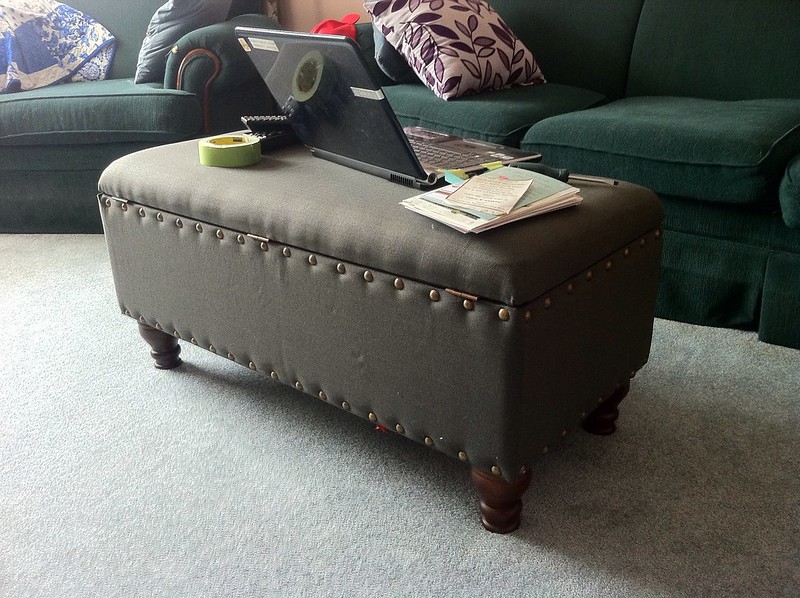
Mike and I made two real furniture purchases in the past week or so, and one of those pieces is this upholstered storage ottoman from HomeSense. I usually find furniture from here to be pretty pricey, but this wasn't too bad...especially since we had a gift card to burn. It's a great size and shape for us to use as a coffee table, and the fabric and oversized nailhead trim make me happy, despite it not being the most high quality thing in the world. Mike's actually the one who spotted it so kudos to him.

grey upholstered storage ottoman bench

We've got our eyes on this sectional, which I'm hoping we pull the trigger on sooner rather than later so that we can send the green beasts elsewhere.

Can I just say that it's really, really exciting to be planning to decorate a room that doesn't have to be torn entirely apart?!


Did you like this post? Click here to subscribe and be notified of new posts. You can also find me on Twitter, Facebook, Bloglovin and Pinterest.
Lumpy the Ottoman Returns

August 11, 2011

So...I failed this project. And I've also failed the kitty litter cabinet project. Boyfriend is taking that one over for me this weekend.

Always have a plan. A drawing. Measurements. SOMETHING.

I didn't do those things for the ottoman or the kitty litter cabinet. I just cut and hammered and stapled all willy nilly. And the results show it.

So, without further ado, remember Original Lumpy?


Here's Lumpy 2.0 (with his other lumpy sibling):


That pleat on the left was not intentional.

"It doesn't look that bad!" You might be tempted to exclaim. But trust me...it's horrific. Hence why I'm only showing you a picture of it from afar.

I had bought some black rope trim to put around it. But, the following conversation occured.

Me: How does it look with the rope?

Boyfriend: ....Arabian.

So the rope stayed off, and the ottoman was deemed finished. Crappy, but finished.

My next project is something I'm more comfortable with - stripping old paint and repainting. Thank goodness!

I looooove productivity, but not as much as you, you see...

August 8, 2011

I don't know what's going on, but the Photobucket app on my phone is refusing to cooperate, so this may be a pictureless post.

My ottoman is almost finished! I relied on my staple gun a lot more than necessary. But that's because the sewing machine scares me. But I used it! And I threaded (is that a word?) it all by myself! I followed the directions! I'm a "wing it" kinda gal, so this is big news.

Also, that was far too many bings. Are the boyfriend and I crazy for calling exclamation points "bings"?

I had an especially talented helper yesterday. And Photobucket has lost it's battle.


Really, she's kind of annoying.

Ottoman Cosmetic Surgery - Cut 1

July 19, 2011

I'm tackling my first attempt at re-doing the fabric on a piece of furniture. It just so happens that it will also be my first time using a sewing machine.

Perhaps I have lofty goals.

When I lived in a teeny tiny basement apartment, I purchased two cheap-o Ikea ottomans in lieu of a coffee table. They cost a whopping $17 each or something like that (I was on a budget, hence no coffee table!).

Now that I live in my very own house and can make significant decorating decisions, I've decided to re-cover the little lumps. Right now, they are ugly and frumpy.


But LOOK at this fabric that I found, on sale for half price at Fabricland. I'm absolutely in love with it.


I also picked up these awesome antique cast iron and porcelain casters from eBay.


I gave them a good once over with some steel wool, to get rid of as much of the rust as I could. I then clear coated them with a Rustoleum spray, to hopefully deter any continued oxidation.

That's as far as I've gotten so far. We're having a wicked heat wave right now (and I think the rest of the continent is, too), so my energy level has been next to zilch. Hopefully soon I'll have a finished product to share!


Blog Design by Nudge Media Design | Powered by Blogger