When I first started humming and hawing over what I was going to do to manage light and privacy in the living room, I thought I might use cheap pull down shades behind a fake roman shade. But when I was at Lowes, they had discounted some pretty high quality shades down to $8 from $32. There were only two left in the size that I needed. The problem was, they weren't the same colour.
And then I had an idea...why not layer some fabric that I like over top?
So I grabbed them, and then the next day ordered some fabric samples from Online Fabric Store and Tonic Living. In the end, I ended up ordering the fabric I had been leaning towards since I started browsing - this P. Kaufmann fabric from OFS.
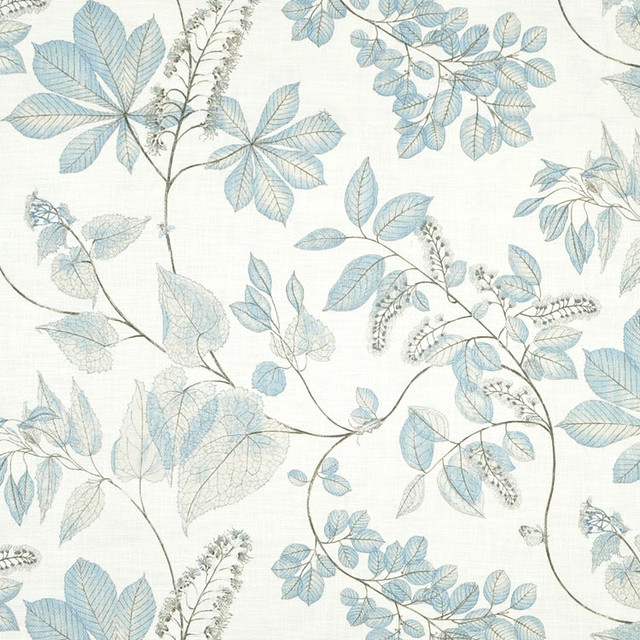
P. Kaufmann Arboretum, Cloud
It didn't take very long to arrive, but they do use UPS to ship so I had a surprise $20 charge at the door. Blerg.
Anyway, here's what they ended up looking like (well, one of them. I just finished the second one before sitting down to write this).
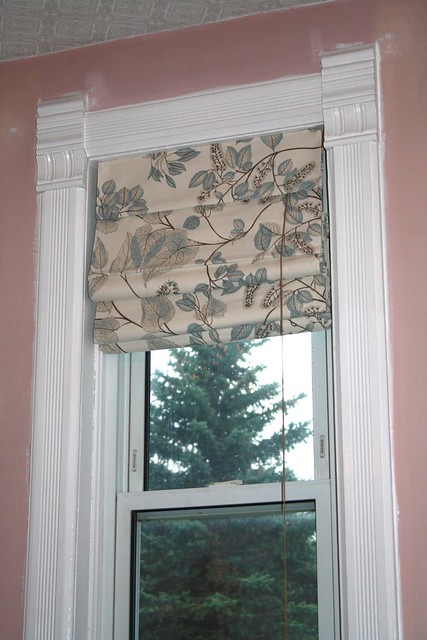
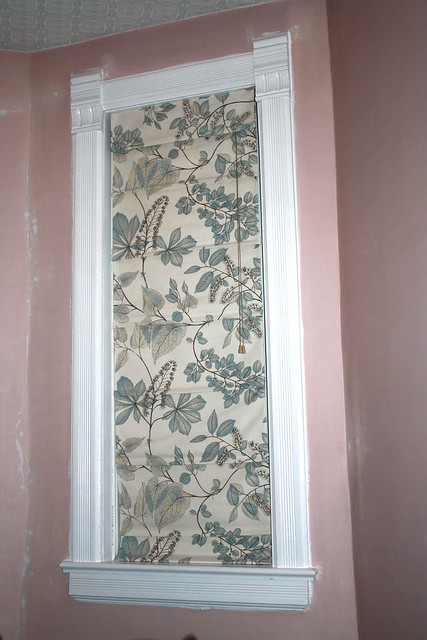
I was a little worried that they wouldn't fold up properly with the extra fabric added, but it doesn't seem to be a problem.
Here's how I did it!
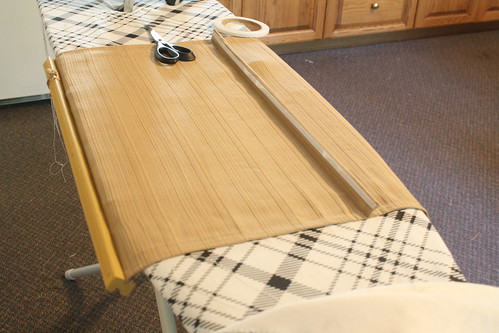
Lay your fabric out, and place your shade over top. Cut around the shade, leaving enough allowance for you to fold over the edges.
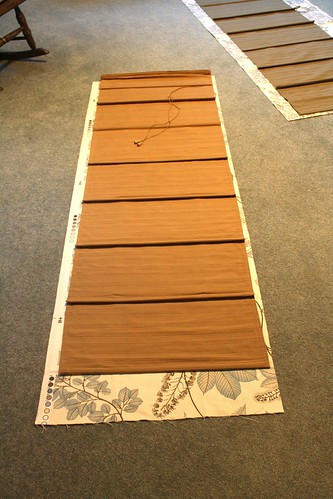
I didn't have as much room as I'd like, because to be honest, I misordered (apparently that's not a word). I always think in meters as opposed to yards. The two yards I ordered just barely, barely covered both shades and their included valances.
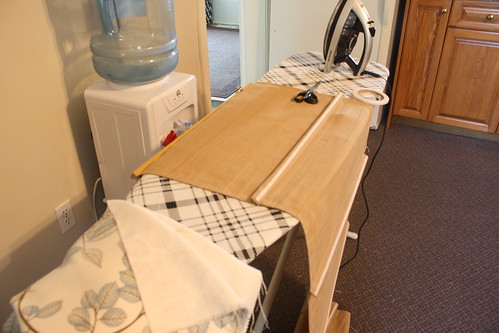
Next, iron out the creases in your fabric. This was the first time I'd used an iron and it was strangely satisfying.
These shades are not no sew, although the amount of sewing is pretty limited. I used iron on fabric fusing tape to adhere the new fabric to the shade.
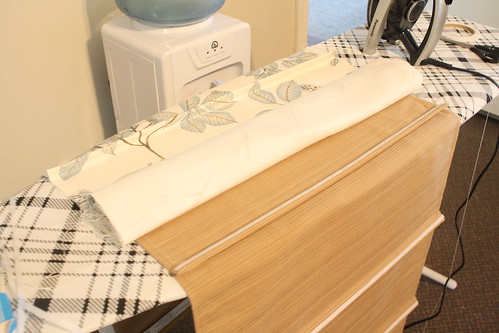
To increase the chances of the shade folding properly, I followed the contour of the original shade. That meant using the tape on both the front face of each folding point, as well as the back side. I hope the pictures below explain what I mean.
I moved top to bottom, starting by attaching the fabric to the top of the shade. If you're using a patterned fabric, make sure you're attaching things the right way! Although the tape stays tacky enough to move it if you need to, it's still a pain. If you don't have much leeway with your side allowances, really make sure you're smoothing as you go and checking to make sure you have enough room to fold over the edges. I also found it easier to keep the fabric in a roll, rather than flipping it back and forth over and over again.
When I reached the bottom, I didn't do the very bottom edge. To get a nice fold, I decided I would do the sides first. Before starting that, though, I decided to hold the shade up to see how it was taking shape, and I was a little worried. It looked sort of baggy. But once I did the sides, everything tightened up.
Apparently this is where I stopped taking pictures. Use the fabric tape along both sides, and then when you reach the bottom, fold up your finishing edge.
At this point, you'll need to do a few stitches at each point where the fabric folds over the original shade. Otherwise, when you pull the shade up, the extra fabric that isn't secured will puff out the sides. I hope that makes sense?!
My original shades came with valances attached with velcro which cover the mounting hardware. I actually started with these, and entirely hand stitched the new fabric to them. This was a stupid idea. Don't do that. The only other thing to note in regards to the valances is to make sure that when you fold over your edges, make sure you don't cover up the velcro.
If I hadn't hand stitched the valances, this little project would have gone a whole lot faster, but even with that stupid move, it wasn't too bad. And definitely not difficult.

In other news, all of the window casings and baseboards have been painted, and I'm hoping to get the walls done this weekend, but don't hold your breath.
Have a good weekend!
Did you like this post? Click here to subscribe and be notified of new posts. You can also find me on Twitter, Facebook, Bloglovin and Pinterest.