Laundry Love

March 26, 2012

Hallelujah!

We have laundry privileges again and it was well over due. I totally lost count of how many loads I did over the weekend. All I know is that I just kept loading and folding, loading and folding, until I was completely caught up.

How about a quick trip down memory lane?

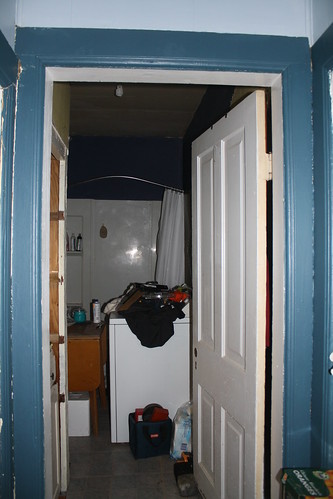
bathroom entrance

The old dryer was right in the road on the way into the bathroom...

victorian farm house bathroom renovation

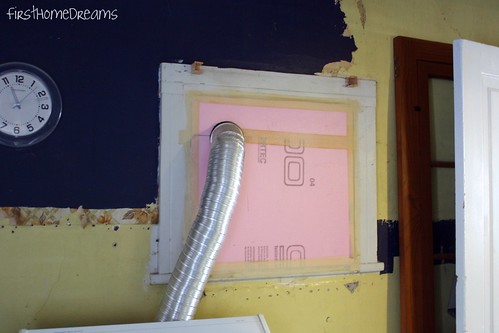
...and it was vented out the window.

victorian farm house bathroom renovation

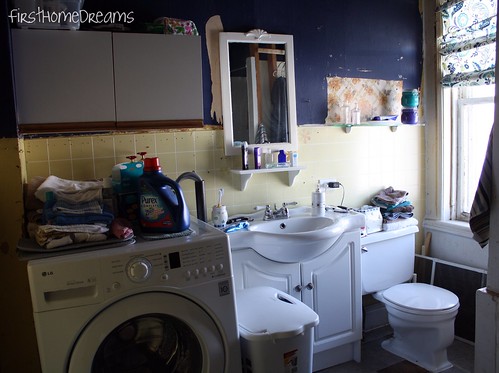
The washing machine wasn't in that bad of a location, but it was completely not level, and the drain was connected to a big piece of ABS pipe that came out the side of the vanity.

Anything we did would have been a huge improvement.

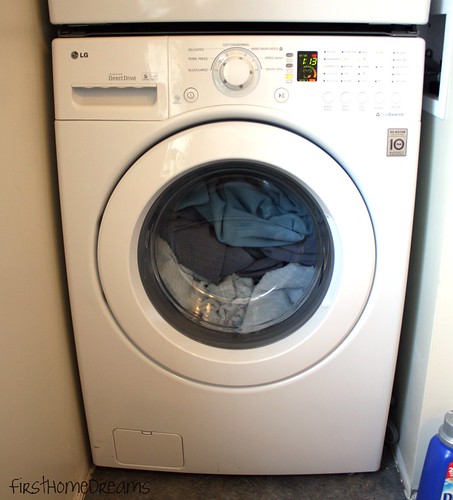
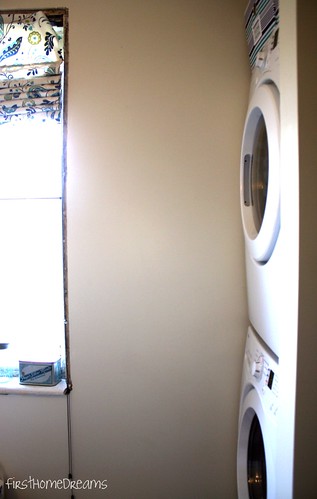
Ready to see our laundry room closet "reveal"?

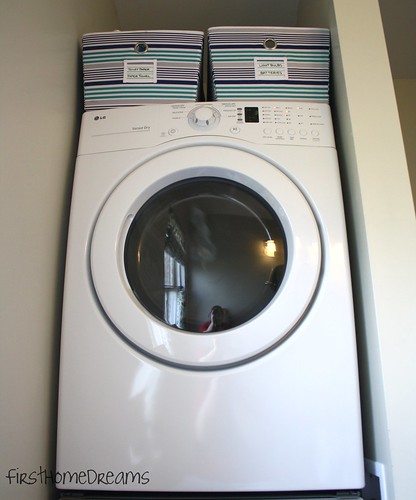
LG stacking laundry pair laundry closet laundry nook sarah richardson vintage

stacking laundry pair laundry nook laundry closet LG sarah richardson vintage

It is literally impossible to get a good picture of them together.

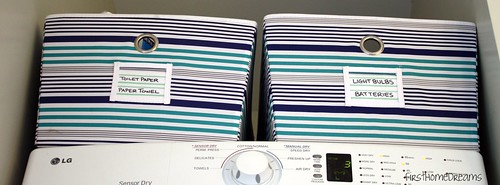
See the bins up on top?

storage above laundry

Storage! We didn't have a home for light bulbs before, and batteries lived in the junk drawer. Extra toilet paper and paper towels were always haphazardly thrown to the side of the stairs to the basement. These bins made a previous appearance here, but they were too big for that space.

Now...in retrospect, we absolutely should have made this space wider. Mike and his dad ended up having to recess the plugs into the wall in order for these guys to fit, and apparently hooking them up was a bit of a nightmare. Whoops. If you're DIYing a similar space...learn from our mistake and give yourself far more room than what is recommended as the minimum in the installation guide for the machines!

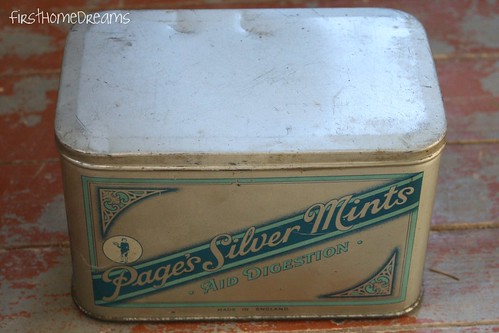
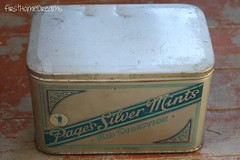
Moving on...remember this tin from the end of this post?

vintage antique page's silver mints tin

Well it's not just pretty - it also has a purpose.

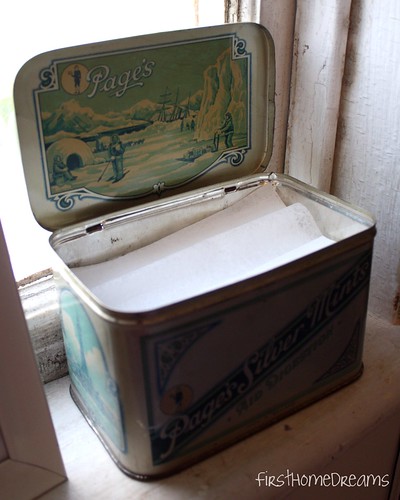
vintage antique page's silver mints tin

I've tucked my dryer sheets inside - I think it looks way more appealing than the cardboard box that they come in. I want to come up with something for the laundry soap, too.

Back in this post, I had a certain vision for a particular wall. Well, I don't have the space that I thought I would.

LG stacking laundry pair laundry nook laundry closet sarah richardson vintage

The window casing that will go back on once the window has been replaced is 5" wide. I think it will look far too cluttered to put anything at all in this spot. Bummer.

Anyway, we're moving along. Lots left to do, but we're getting there.

Happy Monday!


How to Turn Sap into Syrup

March 23, 2012

I declared yesterday on Twitter that I wasn't going to be posting this week and that I'd be back on Monday.

Well I lied.

I didn't feel like writing all week, but I feel like writing now.

Funny how that works.

Maple syrup season is pretty much over (already!) so I thought I should wrap up my maple syrup adventure and give you a little breakdown an how to turn your sap into syrup.

Ideally you want to do this as soon after you've collected as possible, because sap doesn't keep all that well. Last year we had close to 60 gallons go bad because we just couldn't keep up. If you have a large space for cold storage, the "urgency" declines. We have no storage whatsoever.

This year the trees weren't nearly as productive, thanks to the unseasonably high temperatures we've been having. The sap was also significantly darker than last year, resulting in a darker syrup. Did you know that there are different grades of pure maple syrup? I didn't know until last year (I was also admittedly an Aunt Jemima lover).


So you've collected your sap and you're ready to produce some liquid gold (seriously, this stuff is expensive to buy).

Turning Sap into Maple Syrup

We like to work in large batches, because we're lazy like that. We're going to do some things different next year, but I'll explain that at the end of the post.

What you'll need:
  • pots (in several sizes)
  • propane
  • something (safe!) to hold your large pot over the flame
  • metal fine mesh strainer
  • 2 high quality candy thermometer
  • 1 hydrotherm
  • several pre-filters
  • heavy duty wool filter
  • funnel
  • bottles and caps

What you need to do:

1. Pour your sap through a fine mesh filter into a large pot. We begin filtering at this stage to get rid of bugs and large bits of debris. Set your pot up onto your propane burner, and boil hard - for a loooooong time.

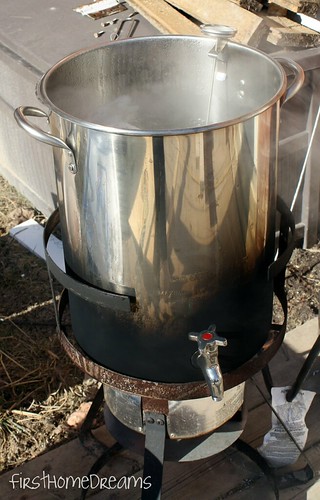
turkey deep fryer for boiling maple syrup

Your eyes do not deceive you - that's a turkey deep fryer. You'll know why in a minute. We like to do the majority of our boiling outside because the amount of water that evaporates from sap is outrageous. We don't have an exhaust fan in the kitchen, and we'd like our house to not turn into a steam room.

2. We boil outside until our sap reaches around 210 degrees Farenheit.  This can literally take hours. And hours. And hours.

3. At this point, we move small batches of sap inside to "finish" into syrup on the stove. This is where the spigot on the turkey fryer comes in incredibly handy! Just throw a smaller pot below the spigot, open it up and fill. No man handling giant pots of boiling hot liquid required.

4. On the stove top, continue to boil your sap until it reaches a temperature of 7.30°F-7.70°F above the boiling point of water. Don't assume that the boiling point of water is constant! Always take the time to boil a pot of water and check the temperature required on the day you're finishing syrup. Humidity and outside temperatures can have a big impact.

5. You've hit the magic temperature - hooray! But you're not finished yet. In order for your sap to officially be syrup, it has to have a certain sugar content. Last year our "syrup" was far too thin, so this year we purchased a hydrotherm to help us get it right. A hydrotherm measures the density as a unit known as Brix. Optimal maple syrup density is between 66.5 and 67.5 Brix (and you can't sell something as maple syrup below 66 Brix).


Using the hydrotherm was intimidating, and it took some digging to find a good explanation of how to use it. I don't really know how it works, but I do know that in order for your sap to be syrup, your hydrotherm needs to be floating in your sample at a point where the level of syrup meets the top of the red line on the hydrotherm. Clear as mud, yes? It makes it even more complicated when the cup you're using to measure isn't clear. And you have terrible lighting in your kitchen so you're using a flash light to peer into the cup.

Side note: I wish we could afford a refractometer. They are magical.

6. Assuming that all has gone well, congratulations, you've made syrup! Now you need to pack it all up for storage. If you haven't already, turn your burner off. Syrup only needs to be at 180 degrees Farenheit for optimal packing. Grab your pre-filter and your wool filter - and stick the pre filter inside your wool filter.

Last year we made a mess. A huge mess. We poured our freshly made syrup into the filters, and stuck the end of the filter into a funnel, and the end of the funnel into the bottle. It was the worst. So this year we bought one of those big coffee urns meant for keeping coffee warm at conferences and the like.


Life saver. Or at least, floor saver.  It made things unbelievably easier, especially since we were using wee 125 ml bottles this time around (because we're giving them out as wedding favours!). We stuck the end of the funnel into our little bottles, and then used the handy dandy spigot on the coffee urn to fill 'em up.

7. Once your bottle is filled, screw on your cap and lay the bottle on it's side for a minute or so. The hot maple syrup will sterilize and seal the cap.

8. Celebrate! Or make pancakes. Or celebrate by making pancakes.

What we'll do different next year:
  • Use a rectangular pan with larger surface area to evaporate water more efficiently.
  • Explore using wood instead of propane.
  • Fine a clear cup for measuring density!

Turning Sap into Maple Syrup 

Have a good weekend!

Psssst! I'm linking this post up to...

Home Stories A2Z


Prime, Paint, All Week Long

March 16, 2012

You guys!

The bathroom is SO CLOSE to being awesome (well, at least compared to it's former tragic self). Let's take a gander at our to-do list...

Bathroom Reno

(in no particular order): 
  • gut entire room, including floor 
    • take salvageable fixtures to Habitat for Humanity Restore 
  • buy new hot water tank, relocate to basement 
  • sister existing joists 
  • lay new sub floor 
  • frame out new walls 
  • re-route all plumbing, using pex 
  • buy floor tile, tile floor 
  • buy tub, install 
  • buy tub alcove tile, tile alcove 
  • buy tub/shower trim kit, install 
  • build/buy vanity, install 
  • buy sink faucet fixture, install 
  • buy mirror, hang 
  • hang drywall 
  • mud drywall 
  • buy exhaust fan, install 
  • buy toilet, install 
  • make new baseboards, paint and install
  • strip and repaint original casings and trim, install
  • replace windows 
  • find a stained glass window for the little window 
  • buy stacking washer and dryer, hook up 
  • sand and repaint original door, hang
  • put original hardware back on 
  • pick a paint colour, paint 
  • pick an over head light fixture, install 
  • pick vanity light fixtures, install 
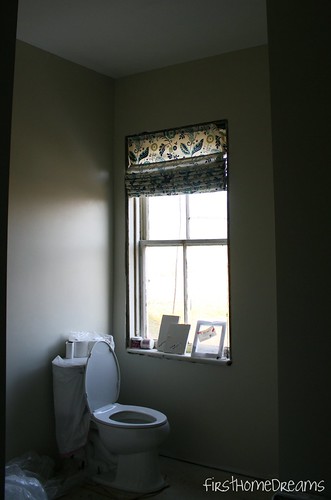
Alright, so we still have a lot to do. But at least it looks like a bathroom again.

victorian farmhouse bathroom renovation vintage by sarah richardson designer palette by para paints

I ended up doing two coats of primer over the drywall. The guy who did our mudding recommended two coats because the texture of the drywall we bought was really rough (we used 1/2" moisture and mold resistant stuff, for anybody wondering), and the difference between it and the texture of the mud was significant. The colour I chose for the walls is "Vintage" from Sarah Richardson's Designer Palette by Para Paints. It's a wonderful greyish yellow and I am in love love love with it. The ceiling colour is Whitewash White from Para's Heritage Collection. I'll be using the same white on the trim (once we get to it!). This was my first time using Para Paint and I was really happy with how it went on - I'll definitely be using it again (added bonus: their kitchen and bath paint that I used for the bathroom is low-ish VOC at 144 gm/l; I'm not sure about their other formulas).

I spent a total of four evenings painting. Prior to starting, I decided to shell out some extra cash for a couple of items, and I think it made a huge difference to how headache free painting went.
  • Shur-Line Easy Release Frame - absolutely worth the extra $3! So easy to get the roller off without making a colossal mess, and "roller walk" was essentially a non-issue.
  • A wooden pole with metal adapter - I almost always snap the flimsier plastic ones because I press way too hard onto the surface that I'm painting. This one held up!
  • Purdy Clearcut paintbrush (2.5") - I am the worst cutter inner ever, but this paint brush was amazing to load and handle, and it lost a total of one bristle the whole time.
Oh, notice the bag over the toilet tank? That's a handy little tip I picked up from here

This weekend we're going to get all of the light fixtures, switches, and outlets installed. After that, my priority is getting the laundry hooked back up - which means we'll have to tile the floor in the laundry "closet" before the rest of the floor. Or we could just hook them up and then move them again when we need to do the floor underneath them, but that sounds like a lot of unnecessary effort. It's not likely to happen this weekend, but maybe next week some time?

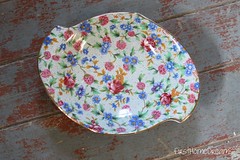
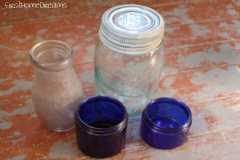
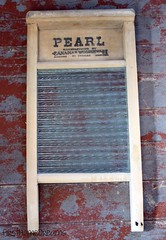
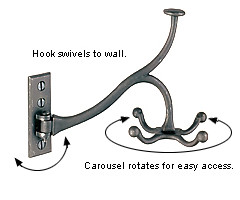
Until next time...here's a "sneak peak" of some the smaller items that are going to make their way into the bathroom.


chintz dish vintage antique royal winton old cottage aqua blue mason ball crown jar glass milk bottle cobalt blue noxema antique vintage jar
vintage antique pearl glass laundry wash board reproduction vintage antique page's silver mints tin
lee valley swivelling coat hook

Happy weekend, everybody!

Wait! There's more! I was not contacted by or compensated by any of the companies mentioned in this post. I'm honestly just really pleased with their products!

Spring in the Minesing Swamp

March 9, 2012

This is what I'm looking forward to:


Have a good weekend - I'll have some updated bathroom pictures for you on Monday!

Wait, there's more! I am a dog loving fool, and if you are too, here's some more videos of Tassy enjoying the swamp!


Growing Pains

March 2, 2012

"What do you want to be when you grow up?"

"Ice cream!"

I wish I could say that that incredibly adorable exchange was between some adult and myself as a wee one, but I can't. It's actually from a talk show like Ricki Lake or Sally Jessy Raphael. This particular episode was focused on child beauty pageants.

Moving on from that awkard and essentially unrelated segway...

The ever delightful and incredibly kind Kerriann of Thistlewood Farm is co-hosting a really neat little link party: What Does Your Blog Want to Be When it Grows Up?

Before I dive into blathering about my goals for the blog, let me tell you that I have a "history" of running into things head first and becoming a wee bit obsessed. In highschool it was sports. In university it was drinking having fun. After university it was fostering death row dogs and learning everything I could about training and behaviour (my very first blog was a dog blog). I wanted to be a dog trainer/behaviourist less than a year ago - but then I clued in that it was more about training people as opposed to dogs and I got sort of turned off. Then a little while ago I was enthralled with figuring out how I could have a goat farm one day. Sometime in there I had a chicken phase, too.

My head is all. over. the. place.

In case you haven't guessed yet, my current obsession is my house and this blog. The beautiful thing is that my house and this blog can encompass so many of my dreams and aspirations. I can produce maple syrup from the trees we have on our property, grow veggies in our garden, keep chickens, and then blog about the process. I can practice Rally-O with Tahsis in the driveway, and share videos of her being a total goof. I can brag about unique hundred year old details of my house and not feel guilty about it, because only those who are interested have to click and read. I can show everyone my lovely little rural part of the world, so close to an incredible wetland that is home to hundreds of unique species of animals.

Yeah, this blog lets me do a lot of things.

But what do I want it to be as it grows up?

1. A reflection of me, my passions, my hobbies, and my life - whatever that turns out to be. At only 25 and recently engaged, I have a lot of growing to do myself.

2. A place to fall in love with writing again. Highschool english and four years of writing snore-inducing research papers in university killed my interest in writing. I'm slowly re-learning the joy of creative writing, of letting words flow a little more freely, and being a lot less monotone.

3. My place to brag and share discoveries. Rather than bore those in my "real life" who just don't care about things like how many broken pieces of china I found in the dirt in our backyard, only those who are interested in what I have to say have to read.

4. A source of inspiration and encouragement. I want others to know that you don't have to be an interior designer to have a beautiful home. Of course, my house is far from beautiful now, but it has so much potential and I love sharing our progress as we muddle through.

5. A place where people can learn about old houses and their quirks. Houses aren't built like they used to be, there's no doubt about that. I hope to let people see that old isn't bad, it just might need a little more care and attention. That's a tough job, in an instant gratification, new is better world.

With all that out there in the open...have a good weekend!


Blog Design by Nudge Media Design | Powered by Blogger