Oli, Oli, Olioboard!

August 24, 2011

I first heard of Olioboard from the fantabulous Addicted2Decorating blog (seriously, follow her. She rocks!). I finally decided to check it out for myself today, and I love it! It's a ton of fun, and I'm quickly discovering that it's easy to kill a whack of time there (just like Pinterest).


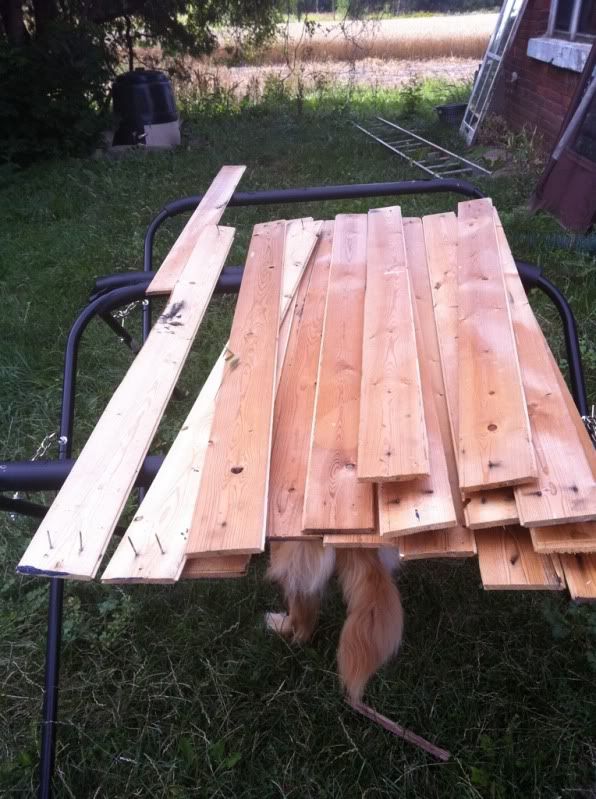
We're in the midst of building our shed right now, and once that's done we can start concentrating again on the bathroom. But let's be honest...I don't care much about designing the shed and haven't really stopped thinking about the bathroom. So, of course when I signed up to Olioboard the first thing I did was get started on my "Test" board using all things bathroom!

It's pretty rough, but that's why it's a "Test". The thing that I really, REALLY love about this, is that it tells you where you can buy all of these items!

While I love that feature, I probably won't purchase much from the mentioned establishments. We already have a white fabric, waffle patterned shower curtain, and we will be re-using our current sink with some modifications so that it will have a similar shape to the one above. The plan is for a dark grey tile floor, perhaps slightly lighter than above. We're going to see about DIY'ing a medicine cabinet in a similar style to the one pictured (with hardware in black/oil rubbed bronze). I ADORE that bath rug from Target and I might buy it because I never see anything I love in stores. My plan is to go with a single above cabinet sconce light from Barn Light Electric, again in a similar style to above. The fabric pictured was just put there for visual reference for me to better imagine my no-sew shades with this scheme. Now that I've found out that I can actually purchase that fabric online, I might just have to get some! It even tells you what colour paint you've selected and what brand makes it. I'm not 100% sold on this colour, but I know I want a pale blue-green.

Thank goodness day-dreaming is free.

Frivolous Friday - Candy Red Stacking Laundry Pair

August 19, 2011

For this week's Frivolous Friday, I'm going to write about my dream of having bright red laundry machines.


I love red. Red makes me happy. But, I can pretty much guarantee that it will never happen. Coloured washing machines are unbelievably expensive...being at least $500+ more than plain ol' white machines. Who knew? Probably everybody. Shush.

We thought we had found a set on sale in our price range. I was delighted! I had images of bright red machines in the corner of the room, and the back side of the door painted a matching bright red so that people would be like "Woah!" when they closed the door. Our laundry machines have to go in our bathroom, which is why visitors would ever be in the same room as the laundry.

But, it was not to be. So that dream has died.

But white will do. It's clean and bright and leaves a lot more room for colour choices!

DIY No Sew Roman Shades

August 18, 2011

Last night, for my "Do One Thing a Day", I made no sew roman shades for my bathroom. I found a great tutorial a few weeks ago when I was browsing Pinterest.


Of course, in true "let's just wing it" fashion, I did make some mistakes by not following the directions. After reading the tutorial a few times I declared, "I got this!" and proceeded to get to work.

Things I didn't use, which would have made things better:
  • glue gun
  • no sew hemming tape
I don't own either of those things, and didn't feel like buying them.

I also made the hem in the wrong order. According to the tutorial, you should make your hems on the side nice and even before attaching your blinds. I did it after, and the back looks messy. I will eventually add some fabric to the back to hide the mess and make the whole thing look more finished.


I picked up 2 meters of on-sale fabric at Fabricland ($5/meter!). Again, this happened to be outdoor fabric which worked fine for this application.

I won't go into any details on how I did this, because the author at 365 Days to Simplicity deserves the credit for making a great tutorial.

I plan on eventually making these for my living room and kitchen as well.

Frivolous Friday - Fancy Measuring Cups

August 12, 2011

I've decided that on Fridays, unless I have something better to post, I'll write a quick little blurb about something I want for no reason other than I find it cute or attractive in some way. This is essentially going to serve as a way for me to remember all of the neat things I'd like to have someday - but not right now because our money is better spent elsewhere.

For today's Frivolous Friday, I'd like to show you this wicked measuring cup set from Anthropologie.

Source: Anthropologie.

Nevermind the fact that I already have two sets of perfectly functional measuring cups. I want these ones! They'll look cute on the counter, rather than stuffed in a drawer. Right?

Lumpy the Ottoman Returns

August 11, 2011

So...I failed this project. And I've also failed the kitty litter cabinet project. Boyfriend is taking that one over for me this weekend.

Always have a plan. A drawing. Measurements. SOMETHING.

I didn't do those things for the ottoman or the kitty litter cabinet. I just cut and hammered and stapled all willy nilly. And the results show it.

So, without further ado, remember Original Lumpy?


Here's Lumpy 2.0 (with his other lumpy sibling):


That pleat on the left was not intentional.

"It doesn't look that bad!" You might be tempted to exclaim. But trust me...it's horrific. Hence why I'm only showing you a picture of it from afar.

I had bought some black rope trim to put around it. But, the following conversation occured.

Me: How does it look with the rope?

Boyfriend: ....Arabian.

So the rope stayed off, and the ottoman was deemed finished. Crappy, but finished.

My next project is something I'm more comfortable with - stripping old paint and repainting. Thank goodness!

30 Minute Chair Update

August 9, 2011

When the boyfriend and I bought our house, we decided we needed to find a kitchen table and chairs on the cheap. So we picked up a beauty* set at a garage sale for $30.

*I say this in the absolute loosest sense of the word, because they're horrific.

The set sat in a barn until we were ready to move them. In fact, only two of the four chairs have made it to our house so far (we've lived here 10 months!) and the table will likely never cross the threshold as we have a much nicer antique one that I somehow forgot that I had already.

The chairs looked like this:

Yes, that is clear vinyl protecting the fabric.

Recovering a chair seat is one of the easiest things to do, ever. As long as you have a staple gun.

Step 1.

Purchase some fabric that you're fond of. I don't know enough about fabric types right now, so I just go for patterns that I like. The pattern I chose yesterday is actually outdoor fabric - on sale for $5 a meter.

Step 2.

Unscrew the seat from the bottom of the chair.


On the first chair, I actually just ripped the seat off without unscrewing. Don't do that.

Step 3. 

Remove the staples, freeing the seat from it's vinyl tomb.


Because the seats were actually in good shape cushion-wise, I didn't bother removing the outdated fabric. If I had of chosen a light coloured fabric, I would have removed it to ensure that it didn't show through.

Step 4.

Lay your vinyl free seat upside down on your fabric (the pattern side of the fabric should also be upside down!). Before cutting, ensure that you have enough overlap to completely cover all sides of the seat.


If you have a fairly large or bold pattern, do your best to center the pattern as well before cutting.

Step 5.

Bring the fabric up over the seat, stapling in place. I did the front and back first, followed by the sides. I did my best to ensure that the folds in the corners were as close to symmetrical as possible.


Step 6.

Re-attach the seat to your chair. It's easiest if you put your chair upside down on a work surface, with the seat in place under it (gravity holds it all in place!). And then you'll have....


Which I think looks a million times better, and is a nice punch of colour.

Now I just need to decide what to do with the backs (because, well, they're still ugly chairs). Which aren't wood, by the way. They're plastic.

I looooove productivity, but not as much as you, you see...

August 8, 2011

I don't know what's going on, but the Photobucket app on my phone is refusing to cooperate, so this may be a pictureless post.

My ottoman is almost finished! I relied on my staple gun a lot more than necessary. But that's because the sewing machine scares me. But I used it! And I threaded (is that a word?) it all by myself! I followed the directions! I'm a "wing it" kinda gal, so this is big news.

Also, that was far too many bings. Are the boyfriend and I crazy for calling exclamation points "bings"?

I had an especially talented helper yesterday. And Photobucket has lost it's battle.


Really, she's kind of annoying.

Sometimes you just need to relax.

August 4, 2011

Despite my post yesterday proclaiming to the world my intent to do one thing a day, yesterday, I did not do that one thing.

Instead, after making dinner and cleaning up, and prepping for tonight's crock pot stew, I went and had a lovely evening with a friend I hadn't seen in awhile.

Sometimes you just have to do that, right?

I imagine tonight will be similar. After dinner, I have a friend coming over with her dog for a training/play date with my own pooch. If we don't get caught up visiting, I'll put in more work on my kitty litter box.

We'll see...

One Thing A Day

August 3, 2011

I'm trying to live by a "do one thing a day" code of life. These are hopefully things outside of regular chores, like dishes, sweeping, etc. Although sometimes I'm just too tired and that's all I'll get done. Or sometimes I'll get nothing done. Whatever.

Yesterday, this is what I did.

Turned this...


Into this...

Home Grown. 2 Peas in a Pod.

To replace this...


Clutter and mess.

I have a corkboard upstairs that I'll install underneath the much smaller, but cuter, version of a whiteboard.

That took all of 5 minutes. I had the frame and glass, and bunch of scrap book paper laying around from perhaps 3 years ago.

I also turned this...


You may remember this wood from here (second picture down).

Into this...


Which I'm hoping will become a less expensive (and notably less fancy) version of this:


Source: Pinterest


The kitty litter currently lives in an ugly closet in the bathroom, which also happens to house the hot water heater. We're getting laundry machines soon (oh thank heavens!) and are removing the closet. We need something to keep the dog out of the kitty candy, so a home made cabinet/box thing it is!

Blog Design by Nudge Media Design | Powered by Blogger